Have you ever used async processing for your applications? Whether for a web-based or a cloud-driven approach, asynchronous code seems inevitable when dealing with tasks that do not need to process immediately. Apache Kafka is one of the most used and robust open-source event streaming platforms out there. Many companies and developers take advantage of its power to create high-performance async processes along with streaming for analytics purposes, data integration for microservices, and great monitoring tools for app health metrics. This article explains the details of using Kafka with .NET applications. It also shows the installation and usage on a Windows OS and its configuration for an ASP.NET API.
How It Works
The world produces data constantly and exponentially. To embrace such an ever-growing amount of data, tools like Kafka come into existence, providing robust and impressive architecture.
But how does Kafka work behind the scenes?
Kafka works as a middleman exchanging information from producers to consumers. They are the two main actors in each edge of this linear process.
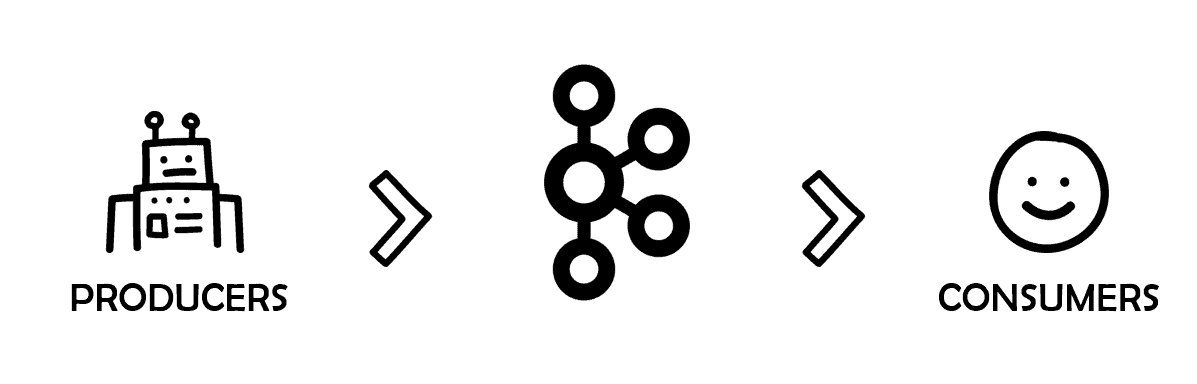
Figure 1. Producers and consumers in Kafka
Kafka can also be configured to work in a cluster of one or more servers. Those servers are called Kafka brokers. You can benefit from multiple features such as data replication, fault tolerance, and high availability with brokers.
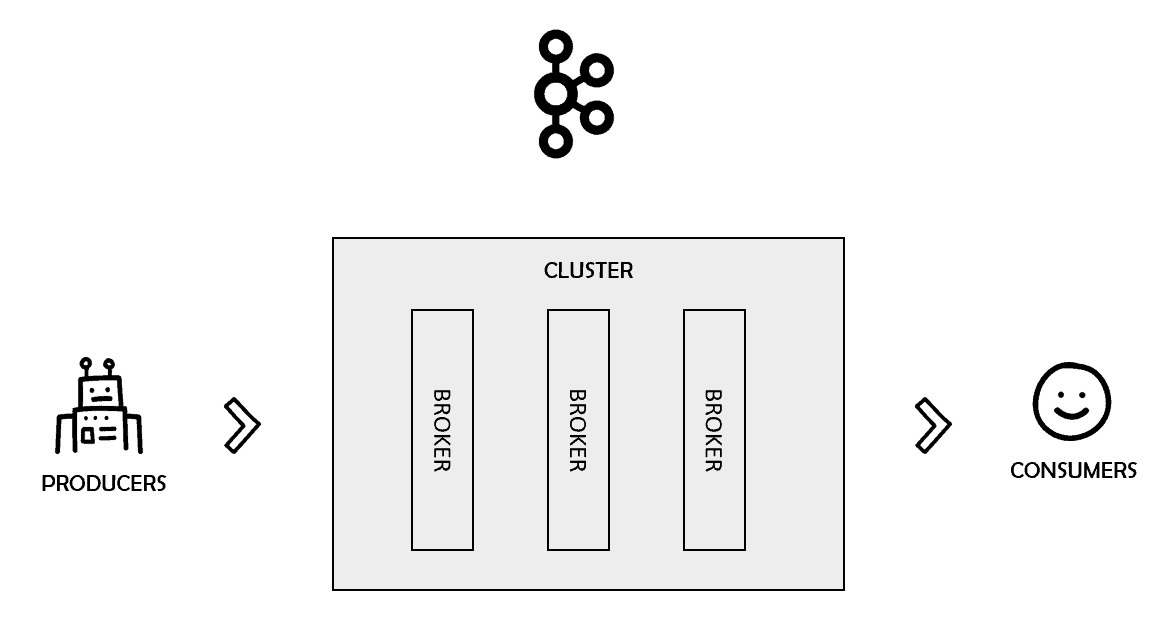
Figure 2. Kafka clusters
These brokers are managed by another tool called Zookeeper. In summary, it is a service that aims to keep configuration-like data synchronized and organized in distributed systems.
Kafka Topics
Kafka is just the broker, the stage in which all the action takes place. The producers send messages to the world while the consumers read specific chunks of data. How do you differentiate one specific portion of data from the others? How do consumers know what data to consume? To understand this, you need a new actor in the play: the topics.
Kafka topics are the channels, the carriage that transport messages around. Kafka records produced by producers are organized and stored into topics.
Imagine that you’re working on a new API project for a catalog of trees and plants. You want to make sure that everybody in the company has access to each newly registered tree. And that is why you picked Kafka.
Every new tree registered within the system is going to be broadcasted via Kafka. The name of the topic is tree_catalog.
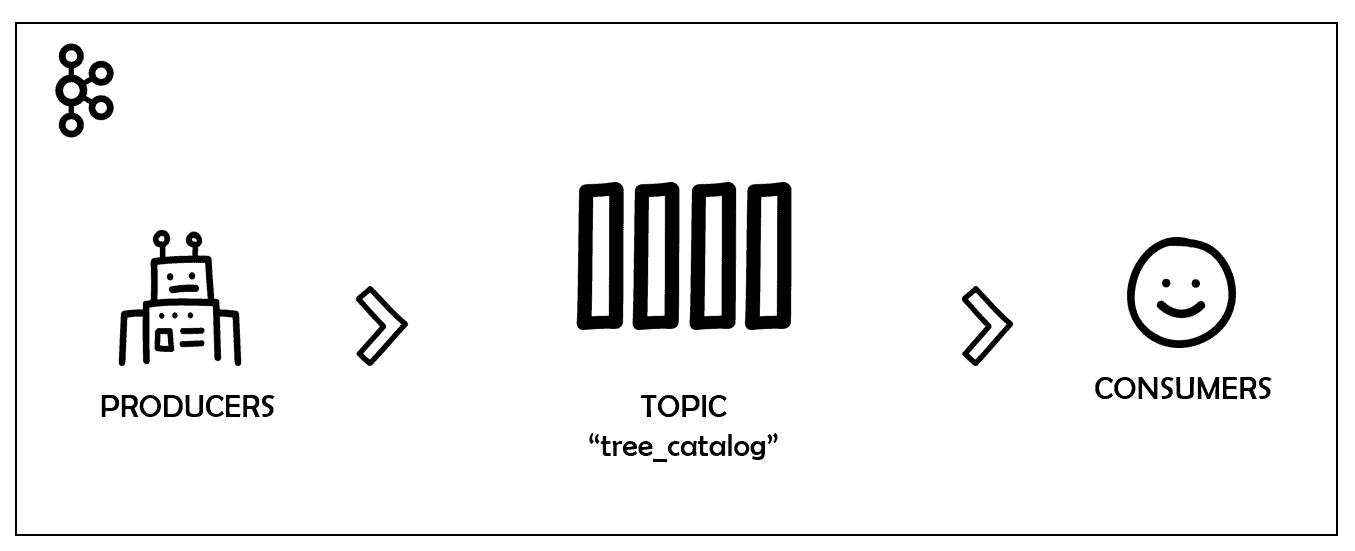
Figure 3. Topic tree_catalog in Kafka
In this relationship, the topics work as a stack. It keeps information in the same position as it arrived and guarantees no data loss.
Each data record that arrives is stored in a slot and registered with a unique position number called offset.
When a consumer consumes a message stored in offset 0, for example, it commits the message stating that everything was ok and moves on to the next offset, and so on. The process usually happens linearly. However, since many consumers can “plug” into the same topic simultaneously, the responsibility of knowing which data positions were already consumed is left to the consumers. That means that consumers can decide which order they will consume the messages, or even if they want to restart the processing from scratch (offset 0).
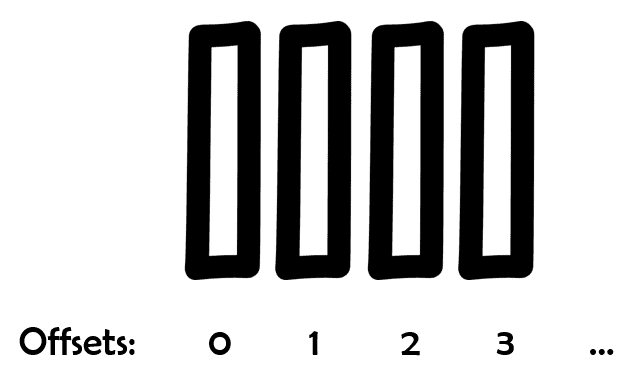
Figure 4. Topic offsets
Topic Partitions
One key feature of distributed systems is data replication. It allows for a more secure architecture since the data is replicated somewhere else in case bad things happen. Kafka deals with replication via partitions. Kafka topics are configured to be spread among several partitions (configurable). Each partition holds data records via unique offsets.
To achieve redundancy, Kafka creates replicas from the partitions (one or more) and spreads the data through the cluster.
This process follows the leader-followers model in which one leader replica always deals with the requests for a given partition while the followers replicate it. Every time a producer pushes a message to a topic, it goes directly to that topic leader.
Consumer Groups
The most appropriate way to consume messages from a topic in Kafka is via consumer groups.
As the name suggests, these groups are formed by one or more consumers that aim to get all the messages from a specific topic.
To do this, the group must always have a unique id (set by the property group.id). Whenever a consumer wants to join that group, it will do so via group id.
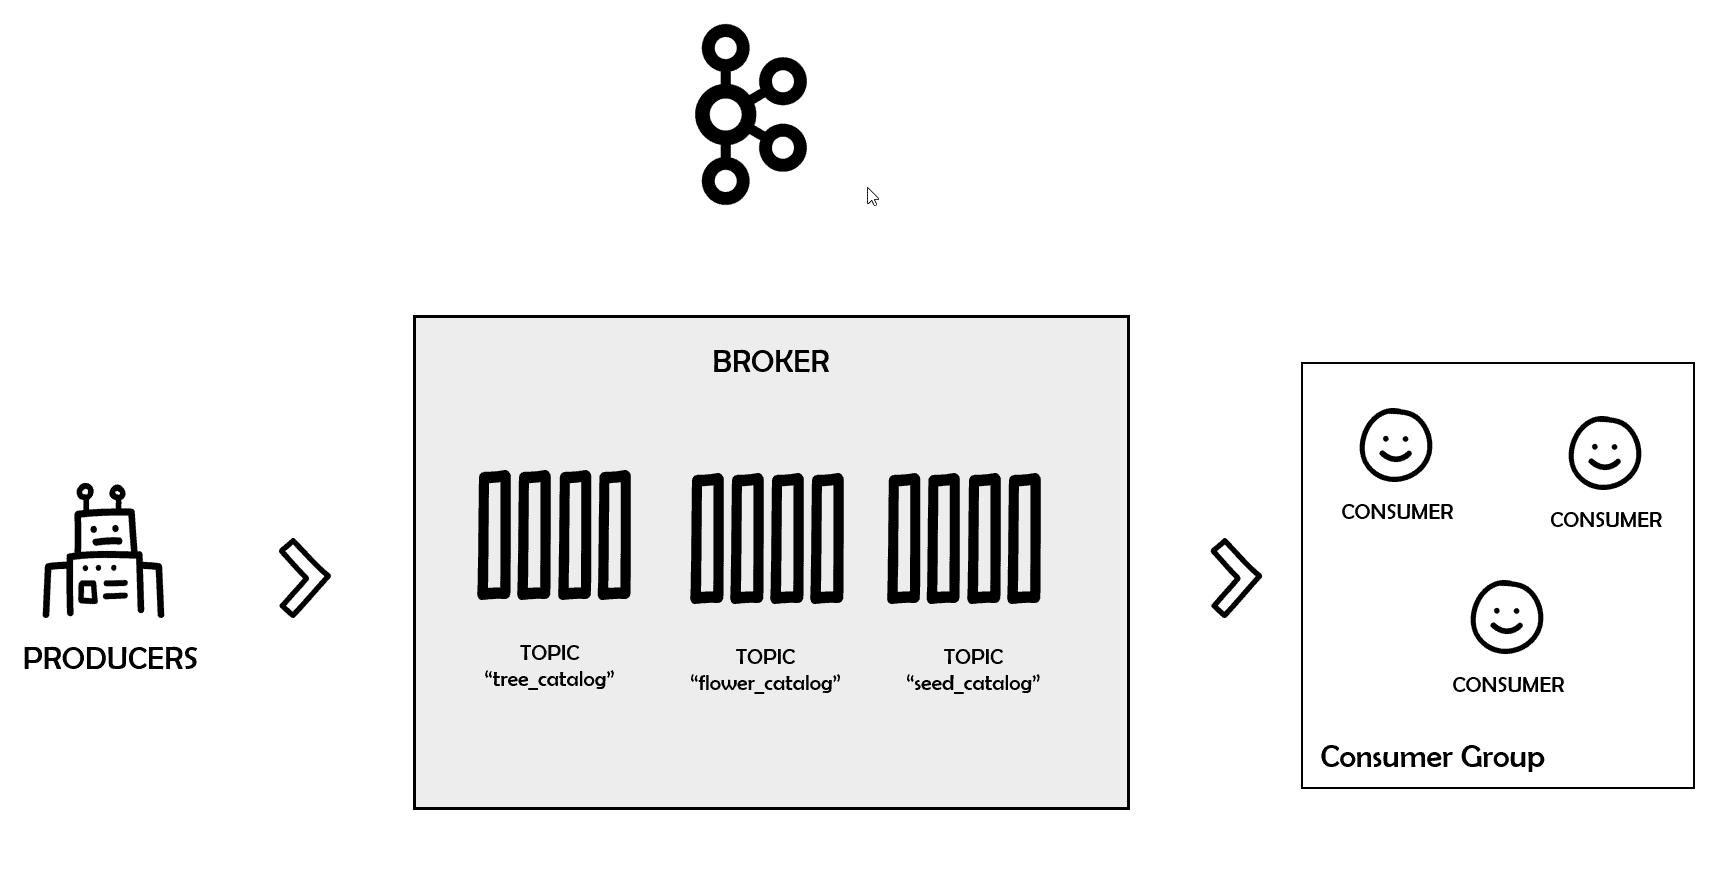
Figure 5. Consumer groups in Kafka
Every time you add or remove consumers to a group, Kafka will rebalance the load among them so that no overhead happens.
Setup
Now that you know the basics of how Kafka universally works, it’s time to move on to the environment setup. To simplify, the example will use Docker to hold the Kafka and Zookeeper images rather than installing them on your machine. This way, you save some space and complexities.
For Windows users, Docker provides a simple way to install and manage your Docker containers: the Docker Desktop. Go to its download page and download the installer. Run it and proceed to the end without changing the default setup options (Figure 6).
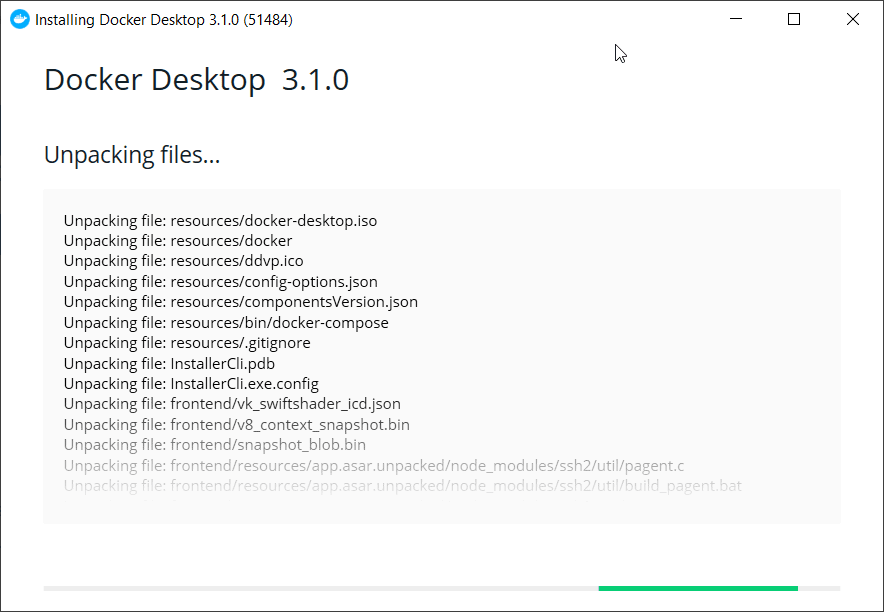
Figure 6. Installing Docker on Windows
Make sure to restart your computer after the process is done. After the restart, Docker may ask you to install other dependencies so make sure to accept every one of them.
One of the fastest paths to have a valid Kafka local environment on Docker is via Docker Compose. This way, you can set up a bunch of application services via a YAML file and quickly get them running.
From a code editor (Notepad++, Visual Studio Code, etc.), create a new file called docker-compose.yml and save the contents of Listing 1 into it.
Listing 1. Creating a docker-compose.yml file
|
1 2 3 4 5 6 7 8 9 10 11 12 13 14 15 16 |
version: '2' services: zookeeper: image: wurstmeister/zookeeper ports: - "2181:2181" kafka: image: wurstmeister/kafka ports: - "9092:9092" environment: KAFKA_ADVERTISED_HOST_NAME: 127.0.0.1 KAFKA_CREATE_TOPICS: "simpletalk_topic:1:1" KAFKA_ZOOKEEPER_CONNECT: zookeeper:2181 volumes: - /var/run/docker.sock:/var/run/docker.sock |
Notice the code imports two service images (kafka and zookeeper) from the Docker Hub’s account called wurstmeister. This is one of the most stable images when working with Kafka on Docker. The ports are also set with their recommended values, so be careful not to change them.
One of the most important settings of this listing belongs to the KAFKA_CREATE_TOPICS config. Here’s the place where you must define your topic name to be automatically created.
There are other ways to create topics, which you’ll see in the future.
Navigate via the command line to the folder where you saved the docker-compose.yml file. Then, run the following command to start the images:
|
1 |
docker-compose up |
This code will start the download of all the dependencies and start the images. During the process, you may see a lot of logs. If no ERROR logs are displayed, then the startup was successful.
Note: You must leave the docker-compose cmd window open, otherwise the images will go down.
To check if the Docker images are up, run the following command in another cmd window:
|
1 |
docker ps |
Figure 7 shows how the output should look.
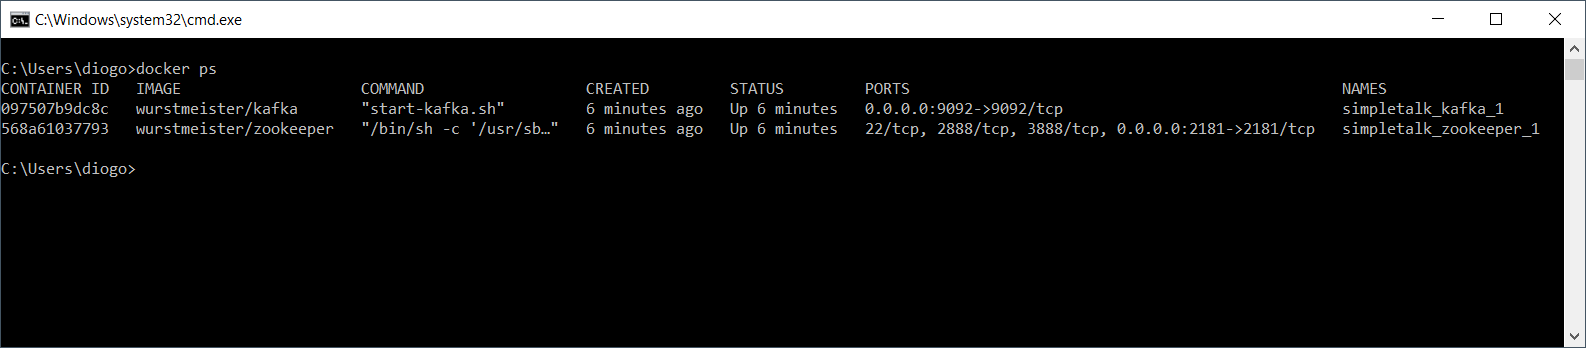
Figure 7. Checking out the installed Docker images
Hands-on
Great! Your Kafka environment is ready to be used. The next step is to jump into the project creation at Visual Studio (VS). Open VS, and head to the project creation window. Search for the ASP.NET Core Web Application template as shown in Figure 8. Click Next.
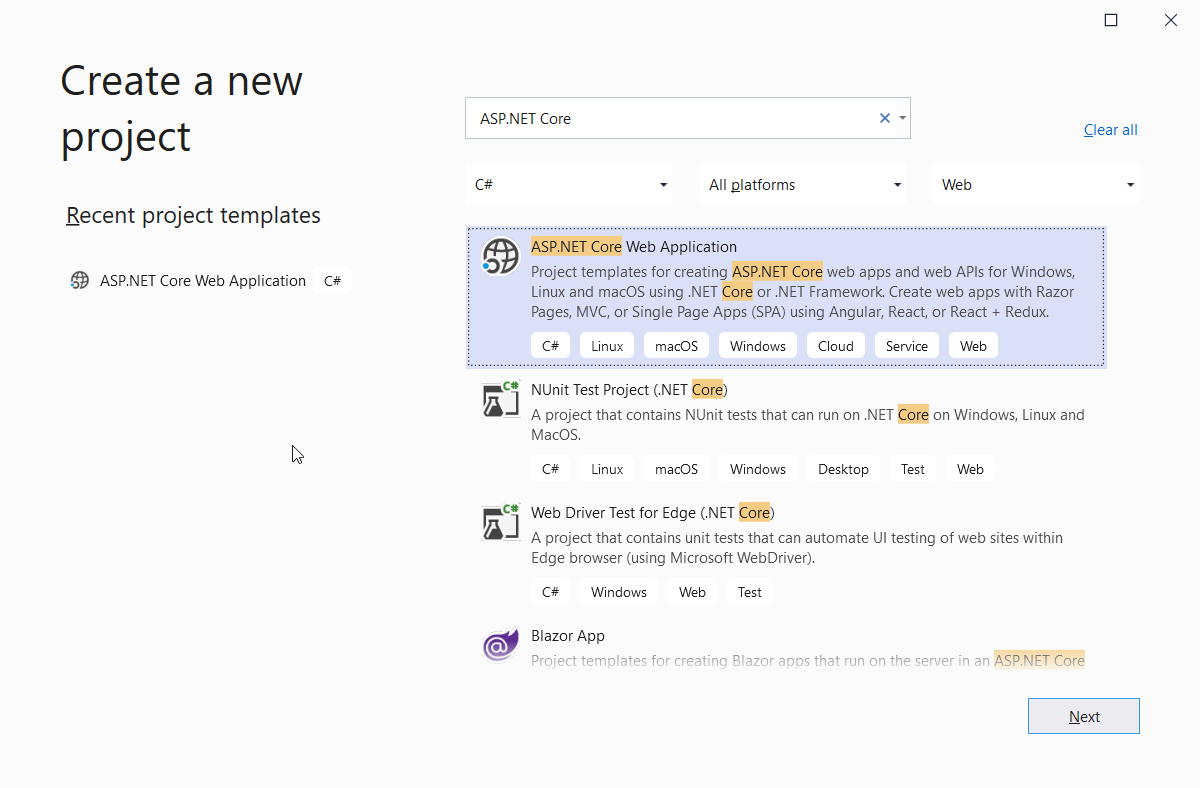
Figure 8. Creating a new ASP.NET Core Web Application
In the following window, make sure to give the solution a different name, as shown in Figure 9. This is because both consumer and producer projects will coexist within the same solution.
Click Create.
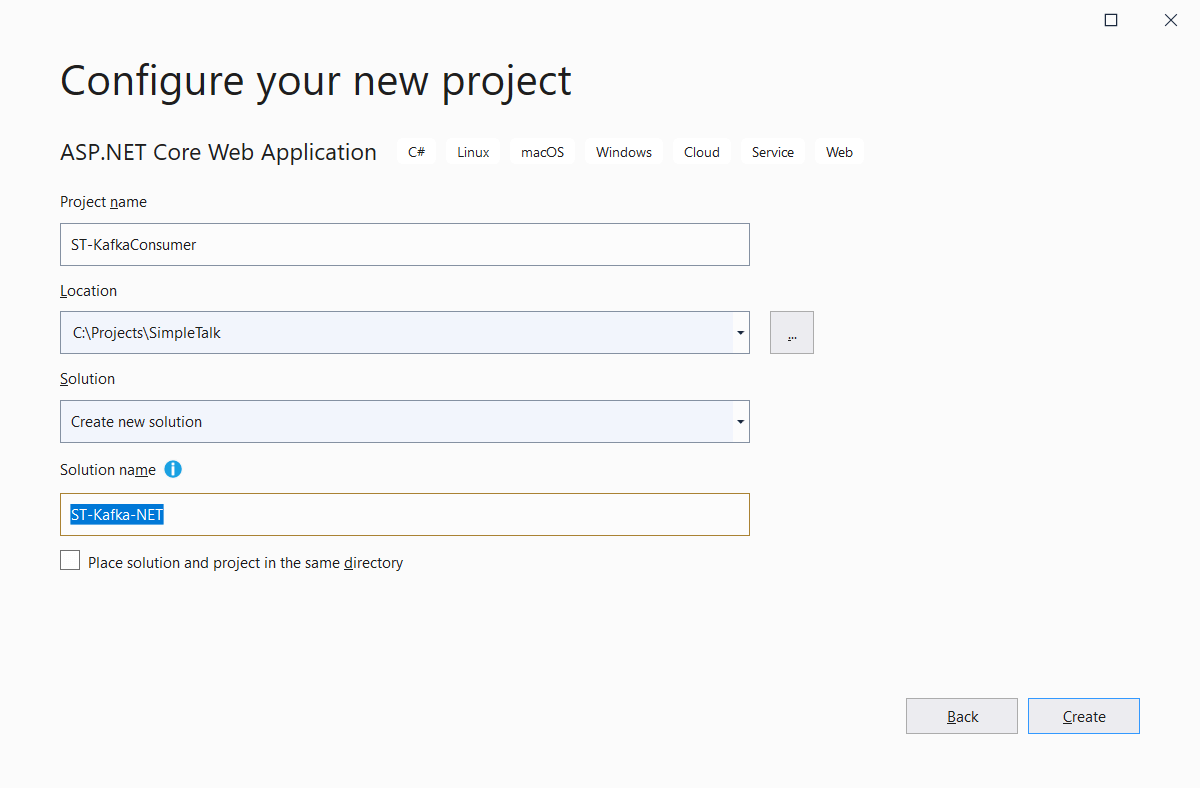
Figure 9. Configuring the project and solution names
The next window asks for a template selection. Select the API template. Unselect the Configure for HTTPS option. Click Create.
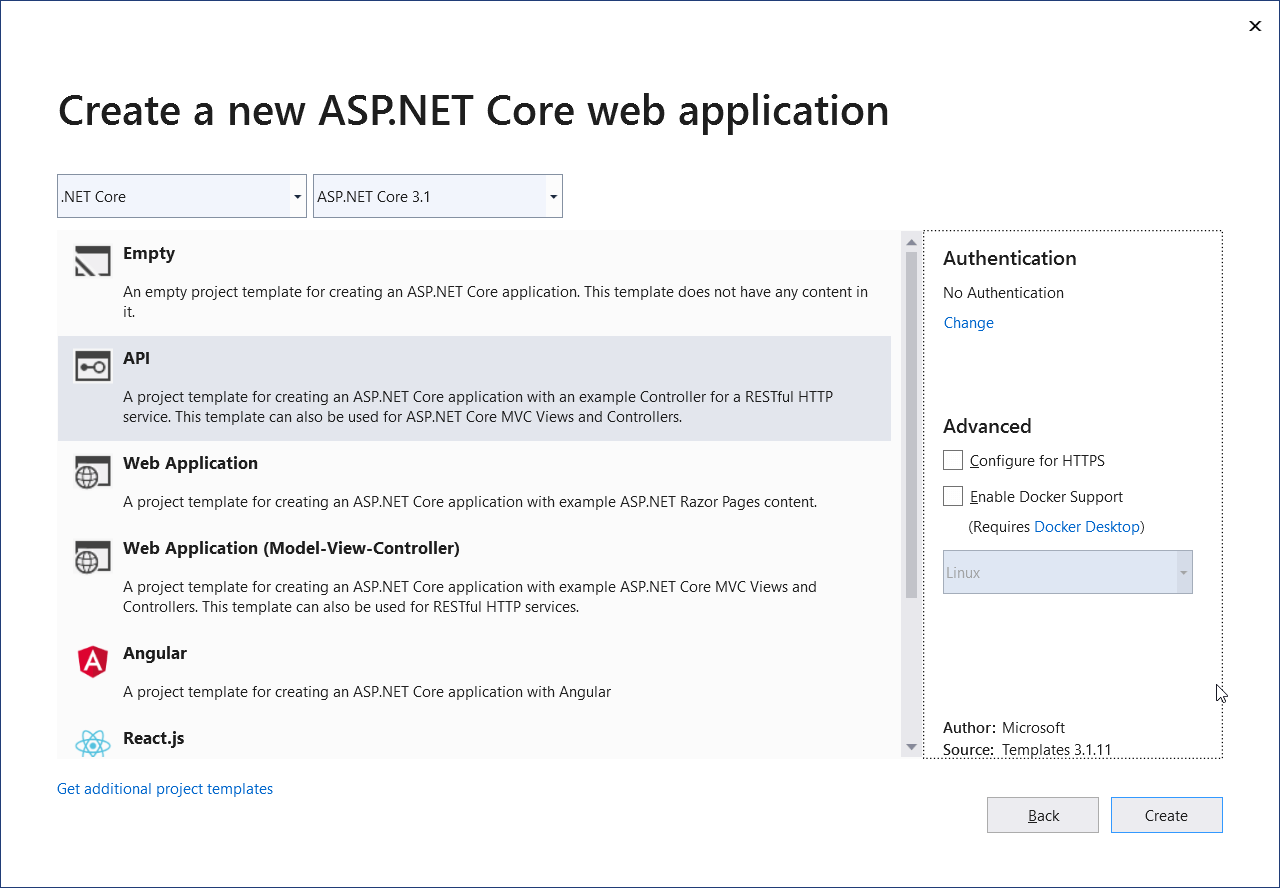
Figure 10. Selecting the project template
When the project is created, right-click the solution and select the Add > New Project… option. Then, select the same ASP.NET Core Web Application project type and click Next.
Give the project a name like shown in Figure 11.

Figure 11. Creating the producer project
Click Create. Go on and select the API template like before, but leave Configure for HTTPS selected. Now, you have two projects in the ST-Kafka-NET solution.
NuGet Packages
To make your C# code understand how to produce and consume messages, you need a client for Kafka. The most used client today is Confluent’s Kafka .NET Client.
To install it, right-click the solution and select the Manage NuGet Packages for Solution… option. Type Confluent in the search box and select the Confluent.Kafka option, as shown in Figure 12.
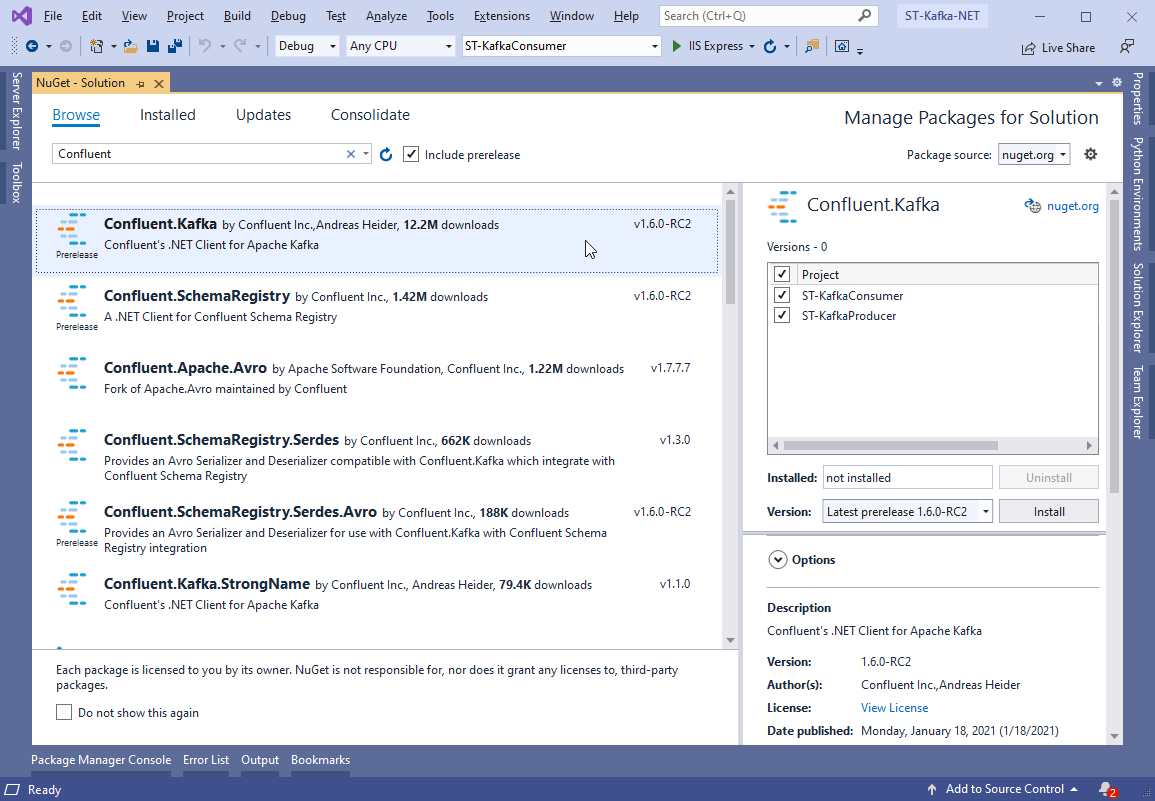
Figure 12. Adding Kafka packages to the solution
Select both projects and click Install. Alternatively, you can add them via command line:
|
1 |
PM> Install-Package Confluent.Kafka |
Setting Up the Consumer
Now to implement the consumer project. Although it is a REST-like application, the consumer is not required. You can have any type of .NET project listening to topic messages.
The project already contains a Controllers folder. You need to create a new one called Handlers and add a new class called KafkaConsumerHandler.cs to it.
Listing 2 shows the new class code content.
Listing 2. KafkaConsumerHandler code
|
1 2 3 4 5 6 7 8 9 10 11 12 13 14 15 16 17 18 19 20 21 22 23 24 25 26 27 28 29 30 31 32 33 34 35 36 37 38 39 40 41 42 43 44 |
using Confluent.Kafka; using Microsoft.Extensions.Hosting; using System; using System.Threading; using System.Threading.Tasks; namespace ST_KafkaConsumer.Handlers { public class KafkaConsumerHandler : IHostedService { private readonly string topic = "simpletalk_topic"; public Task StartAsync(CancellationToken cancellationToken) { var conf = new ConsumerConfig { GroupId = "st_consumer_group", BootstrapServers = "localhost:9092", AutoOffsetReset = AutoOffsetReset.Earliest }; using (var builder = new ConsumerBuilder<Ignore, string>(conf).Build()) { builder.Subscribe(topic); var cancelToken = new CancellationTokenSource(); try { while (true) { var consumer = builder.Consume(cancelToken.Token); Console.WriteLine($"Message: {consumer.Message.Value} received from {consumer.TopicPartitionOffset}"); } } catch (Exception) { builder.Close(); } } return Task.CompletedTask; } public Task StopAsync(CancellationToken cancellationToken) { return Task.CompletedTask; } } } |
This handler must run in a separate thread since it will eternally watch for incoming messages within a while loop. Therefore, it’s making use of Async Tasks in this class.
Pay attention to the topic name and consumer configs. They match exactly what was set in your docker-compose.yml file. Make sure to double-check your typing here, since divergences can lead to some blind errors.
The consumer group id can be anything you want. Usually, they receive intuitive names to help with maintenance and troubleshooting.
Whenever a new message is published to the simpletalk_topic topic, this consumer will consume it and log it to the console. Of course, in real-world apps, you’d make better use of this data.
You also need to add this hosted service class to the Startup class. So, open it and add the following code line to the ConfigureServices method:
|
1 |
services.AddSingleton<IHostedService, KafkaConsumerHandler>(); |
Make sure to import the proper using at the beginning of the class as well:
|
1 |
using ST_KafkaConsumer.Handlers; |
Setting Up the Producer
Moving on to the producer, things will be handled a bit differently here. Since there’s no need for infinite loops to listen to messages arriving, the producers can simply publish messages from anywhere, even from the controllers. In a real application, it’d be better to have this type of code separate from the MVC layers, but this example sticks to the controllers to keep it simple.
Create a new class called KafkaProducerController.cs in the Controllers folder and add the content of Listing 3 to it.
Listing 3. KafkaProducerController code
|
1 2 3 4 5 6 7 8 9 10 11 12 13 14 15 16 17 18 19 20 21 22 23 24 25 26 27 28 29 30 31 32 33 34 35 36 37 |
using System; using Confluent.Kafka; using Microsoft.AspNetCore.Mvc; namespace Kafka.Producer.API.Controllers { [Route("api/kafka")] [ApiController] public class KafkaProducerController : ControllerBase { private readonly ProducerConfig config = new ProducerConfig { BootstrapServers = "localhost:9092" }; private readonly string topic = "simpletalk_topic"; [HttpPost] public IActionResult Post([FromQuery] string message) { return Created(string.Empty, SendToKafka(topic, message)); } private Object SendToKafka(string topic, string message) { using (var producer = new ProducerBuilder<Null, string>(config).Build()) { try { return producer.ProduceAsync(topic, new Message<Null, string> { Value = message }) .GetAwaiter() .GetResult(); } catch (Exception e) { Console.WriteLine($"Oops, something went wrong: {e}"); } } return null; } } } |
The producer code is much simpler than the consumer code. Confluent’s ProducerBuilder class takes care of creating a fully functional Kafka producer based on the provided config options, Kafka server, and topic name.
It’s important to remember that the whole process is asynchronous. However, you can use Confluent’s API to retrieve the awaiter object and then the result that will be returned from the API method. The Message object, in turn, encapsulates the message key and content, respectively. Keys are optional in topics, while the content can be of any type (provided in the second generic argument).
Testing
To test this example, you need to run the producer and consumer applications separately. In the upper toolbar, locate the Startup Projects combo box and select the ST-KafkaConsumer option as shown in Figure 13.
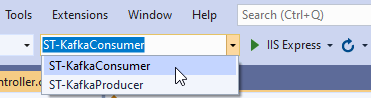
Figure 13. Selecting the consumer project to run
Then, click the button IIS Express to run the consumer app. This will trigger a new browser window that we’ll ignore and minimize since the consumer API is not the focus.
Then, open a new cmd window and navigate to the producer folder. Once there, you can run the command dotnet run to start it up, as shown in Figure 14.
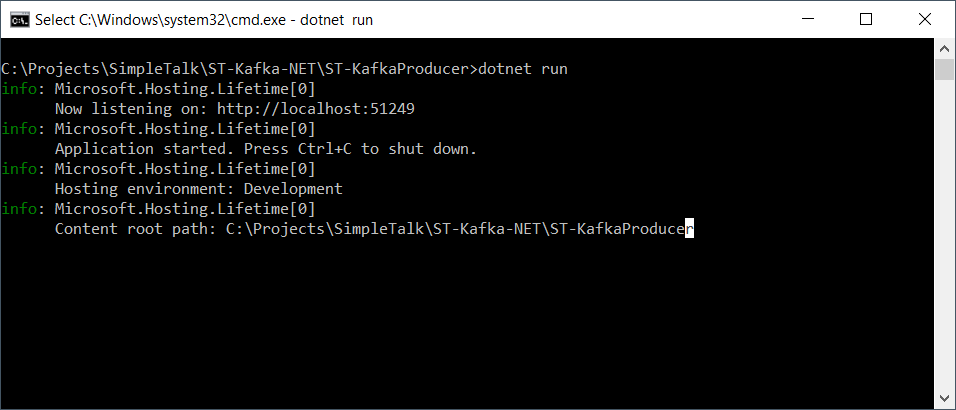
Figure 14. Starting the producer project from the cmd
Pay attention to the URL and port in which it is running.
Now is time to send some messages via producer API. To do this, you can use any API testing tool such as Postman, for example. However, this example will stick to cURL for the sake of simplicity.
For the following commands to work properly, you must ensure that the Docker images are working. So, before running into them, make sure to execute docker ps again to check that out. Sometimes, restarting the computer stops these processes.
If the command doesn’t log anything, run the docker-compose up once more.
To test the publish-subscribe message, open another cmd window and issue the following command:
|
1 |
curl -H "Content-Length: 0" -X POST "http://localhost:51249/api/kafka?message=Hello,kafka!" |
This request will arrive at the producer API and trigger the publish of a new message to Kafka.
To check if the consumer received it, you may locate the Output window and select the option ST-KafkaConsumer – ASP.NET Core Web Server on the Show output from: combo box, as shown in Figure 15.
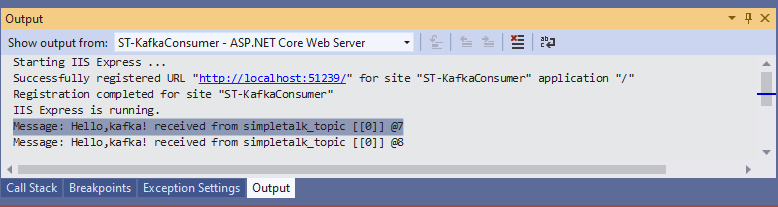
Figure 15. Watching consumer logs
The cmd window may show the JSON result as well. However, it’s not formatted. To fix this, if you have Python installed, you can run the following command:
|
1 |
curl -H "Content-Length: 0" -X POST "http://localhost:51249/api/kafka?message=Hello,kafka!" | python -m json.tool |
Which should produce the output shown in Figure 16.
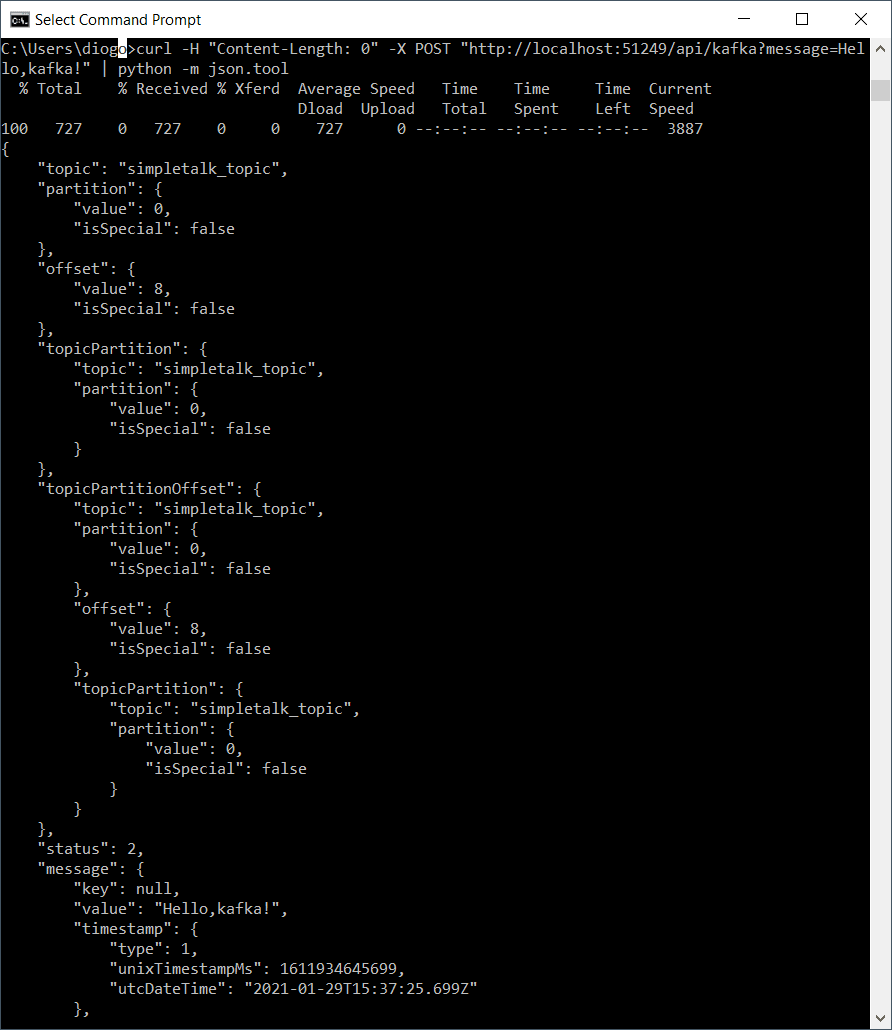
Figure 16. Displaying formatted JSON with Python help
This is all the information about a topic message object you can get for now. A second test will show what happens when the consumer project is down, and a message is published.
Stop the consumer project at Visual Studio and hit another cURL command, but this time with a different message:
|
1 |
curl -H "Content-Length: 0" -X POST "http://localhost:51249/api/kafka?message=Is%20anybody%20there?" | python -m json.tool |
Then, start the consumer project again and watch for the logs. You may see the message being consumed right after startup (Figure 17).

Figure 17. The message arriving after startup
Using Apache Kafka with .NET
Pretty nice, isn’t it? What about you? Have you ever used Kafka for your projects? How was your experience with it?
Kafka is a flexible and robust tool that allows for strong implementations in many types of projects, reason number one why it is so widely adopted.
This article was just a brief introduction to its world, but there’s much more to see like Kafka Streams, working in the cloud, and more complex scenarios from the real world. In the next article, I’ll explore Kafka’s capabilities. Let’s go together!

Load comments