Authorization in ASP.NET Core is the process that determines whether a user can or cannot access a specific resource. It’s not part of the ASP.NET Core Identity library but can be tightly connected to its underline structures such as Claims or Roles and that’s why this post belongs to the ASP.NET Core Identity Series blog posts. On this post we will cover by example the following important authorization types:
- Claims-based authorization
- Role-based authorization
- Policy-based authorization
- Custom authorization policy providers
- Imperative authorization
The source code for the series is available here. Each part has a related branch on the repository. To follow along with this part clone the repository and checkout the authorization branch as follow:
git clone https://github.com/chsakell/aspnet-core-identity.git
cd .\aspnet-core-identity
git fetch
git checkout authorization
The branch contains the final solution so you won’t have anything to do, just understand the concepts and the different types of authorization applied on the project. Before continuing though you have to create the database using Entity Framework migrations descripted in the installation instructions section. In case you don’t want to use a database just set “InMemoryProvider”: true in the appsettings.json.

This post is part of the ASP.NET Core Identity Series:
- Part 1: Getting Started
- Part 2: Integrate Entity Framework
- Part 3: Deep Dive in authorization
- Part 4: OAuth 2.0, OpenID Connect & IdentityServer
- Part 5: External Provider authentication & registration strategy
- Part 6: Two-Factor Authentication
In the first two posts of the series, we covered the basic interfaces that you would need to get started with ASP.NET Core Identity and how to integrate Entity Framework as well. It worths to mention the first change needed in order to start leveraging all the features of the ASP.NET Core Identity library. The change exists on the Startup class:
services.AddIdentity ()
    .AddEntityFrameworkStores ()
    .AddDefaultTokenProviders ();

services.ConfigureApplicationCookie (options => {
    options.Events.OnRedirectToLogin = context => {
        context.Response.Headers["Location"] = context.RedirectUri;
        context.Response.StatusCode = 401;
        return Task.CompletedTask;
    };
    options.Events.OnRedirectToAccessDenied = context => {
        context.Response.Headers["Location"] = context.RedirectUri;
        context.Response.StatusCode = 403;
        return Task.CompletedTask;
    };
});
Notice that we still need to configure the way we send 401 and 403 status codes on the Angular front in order not to get redirected to the default MVC routes that actually don’t exist.
Claims-based authorization

An identity or an IdentityUser if you prefer, may have one more claims assigned. A claim is a name-value pair that describes what the subject is. Let’s recall how the Identity schema looks like in the database:

Authorization rules are defined through Policies and hence the Policy-based authorization where you declare a policy name following by the requirements needed in order to authorize a user request to a specific resource. The way that Claims-based authorization fits on the Policy-based model is simply that the requirement is that the user must have a specific Claim. Back in our project we will assume that we provide a Streaming platform where users can subscribe to video categories and watch online videos, something like Netflix. We want to give the opportunity to users to get a Free Trial subscription where they can access random videos of the platform. To solve this we won’t create a role but instead we will simply assign a Claim named “Trial” to the user and the value will be the date registered for the trial subscription. The steps to accomplish the full “Trial” subscription using Claims based authorization are the following:
- Declare the Claims-based authorization. This usually takes place in the
Startupclass as follow:services.AddAuthorization(options => { options.AddPolicy ("TrialOnly", policy => { policy.RequireClaim ("Trial"); }); });The code declares a “TrialOnly” policy which when applied to a resource allows access to users that have a “Trial” claim assigned.
You won’t find that code in the
Startupclass but don’t worry, we ‘ll get to that soon. - The second step is to apply the policy on a resource. In the project you will find a
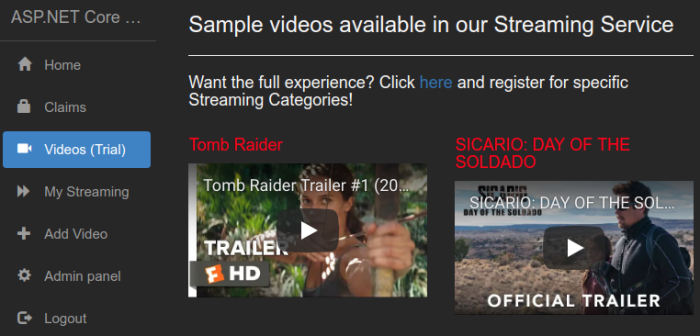
StreamingControllerthat serves the streams. This controller has a Videos action that plays the role of the “Trial” videos.[HttpGet] [Route ("videos")] [Authorize (Policy = "TrialOnly")] public IActionResult Videos () { var videos = VideoRepository.Videos.Take (4); return Ok (videos); } - The third part is to assign a “Trial” claim to a user. You will find that the Register view of our application has a Start a free trial check box.
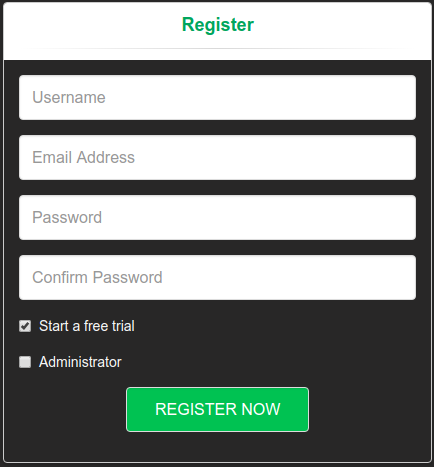
When you try to register a user while having this checkbox checked, theAccountControllerregister method will assign a “Trial” claim to the user.result = await _userManager.CreateAsync (user, model.Password); if (result.Succeeded) { if (model.StartFreeTrial) { Claim trialClaim = new Claim ("Trial", DateTime.Now.ToString ()); await _userManager.AddClaimAsync (user, trialClaim); } else if (model.IsAdmin) { // Code omittedGo ahead register a Trial user and navigate to /videos. Confirm that you can access the view.


The value of the Claim can be used to check for example if the Trial period has ended. If so you can return a 403 code to the user.
Role-based authorization

As the name implies Role-base authorization is used to prohibit or authorize access to resources based on whether the user has specific roles assigned. It’s defined in the same way we defined the “TrialOnly” policy but this time using the RequireRole method. Our Streaming Platform website has an Admin view where Administrators can see all users registered in the system and by Administrators we mean users with the role Admin assigned. The way the role based authorization policy is used in the project is the following:
- Define the AdminOnly policy:
services.AddAuthorization(options => { options.AddPolicy ("TrialOnly", policy => { policy.RequireClaim ("Trial"); }); options.AddPolicy ("AdminOnly", policy => { policy.RequireRole ("Admin"); }); }); - Allow only Administrators to access the Admin Panel view in the
ManageController[HttpGet] [Authorize(Policy = "AdminOnly")] public async Task<IActionResult> Users () { return Ok(_context.Users); }The Policy property may have more than one roles, comma separated.
- Make sure the the Admin role is created in the database. There is a
DbInitializerclass to do this jobvar adminRoleExists = await _roleManager.RoleExistsAsync("Admin"); if (!adminRoleExists) { //Create the Admin Role var adminRole = new IdentityRole ("Admin"); var result = await _roleManager.CreateAsync (adminRole); if (result.Succeeded) { // Add the Trial claim var foreverTrialClaim = new Claim ("Trial", DateTime.Now.AddYears(1).ToString()); await _roleManager.AddClaimAsync (adminRole, foreverTrialClaim); } }If you noticed in the database diagram a role may have 1 or more claims as well and this is what we did above. We added the “Trial” claim to the “Admin” role which means that an Admin will be able to access the Videos (Trial) view as well.
- Assign the Admin role to a user. In the register view check the Administrator checkbox and create a new user. The
AccountControllerwill assign the “Admin” role to the user and will be able to access the Admin Panel viewresult = await _userManager.CreateAsync (user, model.Password); if (result.Succeeded) { if (model.StartFreeTrial) { Claim trialClaim = new Claim ("Trial", DateTime.Now.ToString ()); await _userManager.AddClaimAsync (user, trialClaim); } else if (model.IsAdmin) { await _userManager.AddToRoleAsync (user, "Admin"); } // code omitted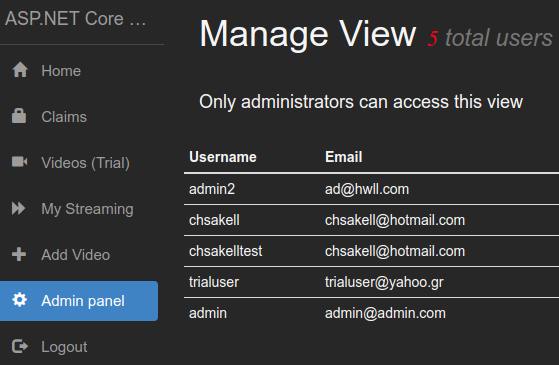

Custom authorization policy providers

Now that we covered the most basic authorization types let’s explore more advanced scenarios. At the end of this section you will also understand how the two previous types works behind the scenes. Our Streaming Service platform has lots of video categories that a user may register for and of course these categories may grow in the future as well. Currently there are the following streaming categories:
public enum StreamingCategory {
    ACTION_AND_ADVENTURE = 1,
    ACTION_COMEDIES = 2,
    ACTION_THRILLERS = 3,
    SCI_FI = 4,
    ANIMATION = 5,
    MUSIC_VIDEOS = 6,
    BOXING_MOVIES = 7,
    FAMILY_MOVIES = 8
}
The question here is how would you implement authorization for each of those categories? Of course you could create a Claims-based authorization for each one or (even worse) create a specific Role for each category and the related Role-based policy. But there’s a better and cleaner way to accomplish this and this is where custom Authorization Policy Providers comes into the scene. Following are the steps to create the custom Policy Provider for our streaming platform:
- First of all we need somehow to identify the Policy to be used and check the user against. For this we will create a custom
AuthorizeAttributenamed StreamingCategoryAuthorizeAttribute. The role of this attribute is to be applied to each one of the StreamingController actions with a custom parameter equal to the specific category we want to secure the access. Following is theStreamingCategoryAuthorizeAttributeclass:public class StreamingCategoryAuthorizeAttribute : AuthorizeAttribute { const string POLICY_PREFIX = "StreamingCategory_"; public StreamingCategoryAuthorizeAttribute (StreamingCategory category) => Category = category; // Get or set the Category property by manipulating the underlying Policy property public StreamingCategory Category { get { var category = (StreamingCategory) Enum.Parse (typeof (StreamingCategory), Policy.Substring (POLICY_PREFIX.Length)); return (StreamingCategory) category; } set { Policy = $"{POLICY_PREFIX}{value.ToString()}"; } } }The role of the attribute is to expose the custom Policy name for each category and that’s because authorization policies are identified by their names. To understand how a custom Streaming Category policy name looks like, take a look of how this attribute is applied in the ActionAdventure action of the
StreamingController.[HttpGet] [Route ("ACTION_AND_ADVENTURE")] [StreamingCategoryAuthorize (StreamingCategory.ACTION_AND_ADVENTURE)] public IActionResult ActionAdventure () { var videos = VideoRepository.Videos .Where (v => v.Category == StreamingCategory.ACTION_AND_ADVENTURE); return Ok (videos); }We set the Category property of the Attribute to StreamingCategory.ACTION_AND_ADVENTURE which means:
Policy = "StreamingCategory_ACTION_AND_ADVENTURE";
Same applies for other actions and categories.
- The next step is to create a custom
IAuthorizationPolicyProviderand define how these dynamic authorization policies are supplied.IAuthorizationPolicyProvideris a type which can provide an AuthorizationPolicy for a particular name. The interface looks like this:public interface IAuthorizationPolicyProvider { /// <summary> /// Gets an AuthorizationPolicy from the given policyName /// </summary> /// <param name="policyName">The policy name to retrieve.</param> /// <returns>The named AuthorizationPolicy</returns> Task<AuthorizationPolicy> GetPolicyAsync(string policyName); /// <summary> /// Gets the default authorization policy. /// </summary> /// <returns>The default authorization policy.</returns> Task<AuthorizationPolicy> GetDefaultPolicyAsync(); }When not using a custom IAuthorizationPolicyProvider then the
DefaultAuthorizationPolicyProviderdefault implementation is used.public class DefaultAuthorizationPolicyProvider : IAuthorizationPolicyProvider { private readonly AuthorizationOptions _options; /// <summary> /// Creates a new instance of DefaultAuthorizationPolicyProvider /// </summary> /// <param name="options">The options used to configure this instance.</param> public DefaultAuthorizationPolicyProvider(IOptions<AuthorizationOptions> options) { if (options == null) { throw new ArgumentNullException(nameof(options)); } _options = options.Value; } /// <summary> /// Gets the default authorization policy. /// </summary> /// <returns>The default authorization policy.</returns> public Task<AuthorizationPolicy> GetDefaultPolicyAsync() { return Task.FromResult(_options.DefaultPolicy); } /// <summary> /// Gets an AuthorizationPolicy from the given policyName /// </summary> /// <param name="policyName">The policy name to retrieve.</param> /// <returns>The named AuthorizationPolicy</returns> public virtual Task<AuthorizationPolicy> GetPolicyAsync(string policyName) { // MVC caches policies specifically for this class, so this method MUST return the same policy per // policyName for every request or it could allow undesired access. It also must return synchronously. // A change to either of these behaviors would require shipping a patch of MVC as well. return Task.FromResult(_options.GetPolicy(policyName)); } }As you can see an
IAuthorizationPolicyProviderhas a GetPolicyAsync method that returns the policy for the given policy name (IF FOUND) and a GetDefaultPolicyAsync method which returns the fallback default authorization policy. This is very critical to understand because ASP.NET uses only one instance of IAuthorizationPolicyProvider which means that if the custom provider cannot provide an authorization policy for a given policy name then it should fall back to a default implementation. Back to our project, check out the GetPolicyAsync method in theStreamingCategoryPolicyProviderclass.public Task<AuthorizationPolicy> GetPolicyAsync (string policyName) { if (policyName.StartsWith (POLICY_PREFIX, StringComparison.OrdinalIgnoreCase)) { var category = (StreamingCategory) Enum.Parse (typeof (StreamingCategory), policyName.Substring (POLICY_PREFIX.Length)); var policy = new AuthorizationPolicyBuilder (); policy.AddRequirements(new StreamingCategoryRequirement(category.ToString ())); return Task.FromResult (policy.Build ()); } else { // If the policy name doesn't match the format expected by this policy provider, // try the fallback provider. If no fallback provider is used, this would return // Task.FromResult<AuthorizationPolicy>(null) instead. return FallbackPolicyProvider.GetPolicyAsync (policyName); } }What the code does it trying to parse the streaming category from the policyName and in case it succeed creates an
AuthorizationPolicyusing anAuthorizationPolicyBuilder. Next the AuthorizationPolicyBuilder adds requirements to the policy which will be evaluated to either authorize or prohibit the access to a specific resource (more on this later on..). Before explaining the requirements lets take a look how the default authorization provider is applied in case the custom one cannot provide a policy:public StreamingCategoryPolicyProvider (IOptions<AuthorizationOptions> options) { // ASP.NET Core only uses one authorization policy provider, so if the custom implementation // doesn't handle all policies (including default policies, etc.) it should fall back to an // alternate provider. // // In this sample, a default authorization policy provider (constructed with options from the // dependency injection container) is used if this custom provider isn't able to handle a given // policy name. // // If a custom policy provider is able to handle all expected policy names then, of course, this // fallback pattern is unnecessary. // Claims based authorization options.Value.AddPolicy ("TrialOnly", policy => { policy.RequireClaim ("Trial"); }); // Role based authorization options.Value.AddPolicy ("AdminOnly", policy => { policy.RequireRole ("Admin"); }); options.Value.AddPolicy("AddVideoPolicy", policy => policy.Requirements.Add(new UserCategoryRequirement())); FallbackPolicyProvider = new DefaultAuthorizationPolicyProvider (options); } public Task<AuthorizationPolicy> GetDefaultPolicyAsync () => FallbackPolicyProvider.GetDefaultPolicyAsync (); // code omittedNow you can understand why the TrialOnly and AdminOnly policies aren’t defined in the Startup class.
You can ignore the AddVideoPolicy for the moment, it is described on the next section
- In ASP.NET Core, authorization is expressed in requirements, and handlers evaluate a user’s claims against those requirements. We have defined in our custom authorization provider, that Streaming Category related policies have a requirement of type
StreamingCategoryRequirement.var policy = new AuthorizationPolicyBuilder (); policy.AddRequirements(new StreamingCategoryRequirement(category.ToString ())); return Task.FromResult (policy.Build ());
A requirement isn’t anything but a simple class implementing the empty
IAuthorizationRequirementinterface which represents an authorization requirement.internal class StreamingCategoryRequirement: IAuthorizationRequirement { public string Category { get; private set; } public StreamingCategoryRequirement(string category) { Category = category; } }So what we have right now is a custom provider that can provide the dynamic streaming category policies and adds a StreamingCategory requirement. What’s missing is how this requirement will be eventually processed and evaluated. This is something that an instance of
AuthorizationHandlerhandles. This class makes the decision if authorization is allowed or not against a requirement.public abstract class AuthorizationHandler<TRequirement> : IAuthorizationHandler where TRequirement : IAuthorizationRequirement { /// <summary> /// Makes a decision if authorization is allowed. /// </summary> /// <param name="context">The authorization context.</param> public virtual async Task HandleAsync(AuthorizationHandlerContext context) { foreach (var req in context.Requirements.OfType<TRequirement>()) { await HandleRequirementAsync(context, req); } } /// <summary> /// Makes a decision if authorization is allowed based on a specific requirement. /// </summary> /// <param name="context">The authorization context.</param> /// <param name="requirement">The requirement to evaluate.</param> protected abstract Task HandleRequirementAsync(AuthorizationHandlerContext context, TRequirement requirement); }Back to our project the
StreamingCategoryAuthorizationHandlerauthorizes requests against StreamingCategory requirements:internal class StreamingCategoryAuthorizationHandler : AuthorizationHandler<StreamingCategoryRequirement> { private readonly UserManager<IdentityUser> _userManager; public StreamingCategoryAuthorizationHandler (UserManager<IdentityUser> userManager) { _userManager = userManager; } protected override Task HandleRequirementAsync (AuthorizationHandlerContext context, StreamingCategoryRequirement requirement) { var loggedInUserTask = _userManager.GetUserAsync (context.User); loggedInUserTask.Wait (); var userClaimsTask = _userManager.GetClaimsAsync (loggedInUserTask.Result); userClaimsTask.Wait (); var userClaims = userClaimsTask.Result; if (userClaims.Any (c => c.Type == requirement.Category)) { context.Succeed (requirement); } return Task.CompletedTask; } }The code checks the user’s claims and if a claim matches the streaming category which means that the user is registered to that streaming category, then authorization is allowed, otherwise denied.
- The final step to complete a custom authorization provider is to register it at the
Startupclass. You also need to register the Authorization Handler you created before.public void ConfigureServices (IServiceCollection services) { services.AddTransient<IAuthorizationPolicyProvider, StreamingCategoryPolicyProvider>(); // As always, handlers must be provided for the requirements of the authorization policies services.AddTransient<IAuthorizationHandler, StreamingCategoryAuthorizationHandler>(); // code omitted
Time to try the custom provider! Go ahead and click My Streaming from the left menu. You will see a list with Streaming Categories. If you click the View button on the right of each category you should see the category’s videos but only if you have been registered to that category. Otherwise you will see the Access Denied view.

Select the categories you wish to register at and then click the Update button. Try again to access one of the category’s videos you have been registered for and confirm that this time you have been authorized.

Let’s see how we prevent unauthorized access to some of our streaming categories in the StreamingController
[HttpGet]
[Route ("ACTION_AND_ADVENTURE")]
[StreamingCategoryAuthorize (StreamingCategory.ACTION_AND_ADVENTURE)]
public IActionResult ActionAdventure () {

    var videos = VideoRepository.Videos
        .Where (v => v.Category == StreamingCategory.ACTION_AND_ADVENTURE);

    return Ok (videos);
}
[HttpGet]
[Route ("ACTION_THRILLERS")]
[StreamingCategoryAuthorize (StreamingCategory.ACTION_THRILLERS)]
public IActionResult ActionThrillers () {
var videos = VideoRepository.Videos
.Where (v => v.Category == StreamingCategory.ACTION_THRILLERS);
return Ok (videos);
}
[HttpGet]
[Route ("SCI_FI")]
[StreamingCategoryAuthorize (StreamingCategory.SCI_FI)]
public IActionResult SCI_FI () {
var videos = VideoRepository.Videos
.Where (v => v.Category == StreamingCategory.SCI_FI);
return Ok (videos);
}
[HttpGet]
[Route ("ANIMATION")]
[StreamingCategoryAuthorize (StreamingCategory.ANIMATION)]
public IActionResult ANIMATION () {
var videos = VideoRepository.Videos
.Where (v => v.Category == StreamingCategory.ANIMATION);
return Ok (videos);
}
Now that we finished explaining requirements, handlers and custom providers can you guess what’s happening behind the scenes when you defining a policy as follow?
services.AddAuthorization(options =>
 {
   options.AddPolicy ("AdminOnly", policy => {
            policy.RequireRole ("Admin");
   });
 });
I would guess that RequireRole is simply a method that adds a requirement passing the role as parameter and there must be a handler that evaluates that requirement by checking if the role is assigned to the user. Well.. let’s find out the truth..
RequireRole is just a method that adds a requirement of type RolesAuthorizationRequirement passing the roles as parameter..
public AuthorizationPolicyBuilder RequireRole(IEnumerable<string> roles)
{
    if (roles == null)
    {
        throw new ArgumentNullException(nameof(roles));
    }

    Requirements.Add(new RolesAuthorizationRequirement(roles));
    return this;
}
The RolesAuthorizationRequirement is not only the IAuthorizationRequirement but also the handler that evaluates that type of requirements (this is actually very convenient).
public class RolesAuthorizationRequirement : AuthorizationHandler<RolesAuthorizationRequirement>, IAuthorizationRequirement
{
    /// <summary>
    /// Creates a new instance of <see cref="RolesAuthorizationRequirement"/>.
    /// </summary>
    /// <param name="allowedRoles">A collection of allowed roles.</param>
    public RolesAuthorizationRequirement(IEnumerable<string> allowedRoles)
    {
        if (allowedRoles == null)
        {
            throw new ArgumentNullException(nameof(allowedRoles));
        }

        if (allowedRoles.Count() == 0)
        {
            throw new InvalidOperationException(Resources.Exception_RoleRequirementEmpty);
        }
        AllowedRoles = allowedRoles;
    }

    /// <summary>
    /// Gets the collection of allowed roles.
    /// </summary>
    public IEnumerable<string> AllowedRoles { get; }

    /// <summary>
    /// Makes a decision if authorization is allowed based on a specific requirement.
    /// </summary>
    /// <param name="context">The authorization context.</param>
    /// <param name="requirement">The requirement to evaluate.</param>

    protected override Task HandleRequirementAsync(AuthorizationHandlerContext context, RolesAuthorizationRequirement requirement)
    {
        if (context.User != null)
        {
            bool found = false;
            if (requirement.AllowedRoles == null || !requirement.AllowedRoles.Any())
            {
                // Review: What do we want to do here?  No roles requested is auto success?
            }
            else
            {
                found = requirement.AllowedRoles.Any(r => context.User.IsInRole(r));
            }
            if (found)
            {
                context.Succeed(requirement);
            }
        }
        return Task.CompletedTask;
    }

}
Imperative authorization
Imprerative authorization is very much like the custom provider type but this time you manually check if the user is allowed to access a specific resource. Let’s assume that you want to allow users to add videos on your streaming platform but only to those categories that are registered for. It makes sense right? To implement that type of functionality you will need a requirement and a handler again but not a custom provider.
public class UserCategoryAuthorizationHandler :
    AuthorizationHandler<UserCategoryRequirement, VideoVM>
{
    private readonly UserManager<IdentityUser> _userManager;

    public UserCategoryAuthorizationHandler (UserManager<IdentityUser> userManager) {
        _userManager = userManager;
    }

    protected override Task HandleRequirementAsync(AuthorizationHandlerContext context,
                                                    UserCategoryRequirement requirement,
                                                    VideoVM resource)
    {
        var loggedInUserTask = _userManager.GetUserAsync (context.User);

        loggedInUserTask.Wait ();

        var userClaimsTask = _userManager.GetClaimsAsync (loggedInUserTask.Result);

        userClaimsTask.Wait ();

        var userClaims = userClaimsTask.Result;

        if (userClaims.Any (c => c.Type == resource.Category.ToString())) {
            context.Succeed (requirement);
        }

        return Task.CompletedTask;
    }
}

public class UserCategoryRequirement : IAuthorizationRequirement { }
The handler simply checks if the category of the video posted by the user belongs to his/her claims (it means that the user is registered to that category). The related policy should be added to the default authorization handler as follow:
options.Value.AddPolicy("AddVideoPolicy", policy =>
    policy.Requirements.Add(new UserCategoryRequirement()));
.. register the handler to the Startup class:
services.AddTransient<IAuthorizationHandler, UserCategoryAuthorizationHandler>();
The last thing remained is to check the AddVideoPolicy policy based permissions for a user. The way you do it is through the IAuthorizationService which is a simple interface and available through dependency injection (registered in the services collection).
public interface IAuthorizationService
{
    /// <summary>
    /// Checks if a user meets a specific set of requirements for the specified resource
    /// </summary>
    /// <param name="user">The user to evaluate the requirements against.</param>
    /// <param name="resource">
    /// An optional resource the policy should be checked with.
    /// If a resource is not required for policy evaluation you may pass null as the value.
    /// </param>
    /// <param name="requirements">The requirements to evaluate.</param>
    /// <returns>
    /// A flag indicating whether authorization has succeeded.
    /// This value is <value>true</value> when the user fulfills the policy; otherwise <value>false</value>.
    /// </returns>
    /// <remarks>
    /// Resource is an optional parameter and may be null. Please ensure that you check it is not
    /// null before acting upon it.
    /// </remarks>
    Task<AuthorizationResult> AuthorizeAsync(ClaimsPrincipal user, object resource, IEnumerable<IAuthorizationRequirement> requirements);

    /// <summary>
    /// Checks if a user meets a specific authorization policy
    /// </summary>
    /// <param name="user">The user to check the policy against.</param>
    /// <param name="resource">
    /// An optional resource the policy should be checked with.
    /// If a resource is not required for policy evaluation you may pass null as the value.
    /// </param>
    /// <param name="policyName">The name of the policy to check against a specific context.</param>
    /// <returns>
    /// A flag indicating whether authorization has succeeded.
    /// Returns a flag indicating whether the user, and optional resource has fulfilled the policy.
    /// <value>true</value> when the policy has been fulfilled; otherwise <value>false</value>.
    /// </returns>
    /// <remarks>
    /// Resource is an optional parameter and may be null. Please ensure that you check it is not
    /// null before acting upon it.
    /// </remarks>
    Task<AuthorizationResult> AuthorizeAsync(ClaimsPrincipal user, object resource, string policyName);
}
Back to the StreamingController AddVideo action we use an instance of IAuthorizationService to evaluate the user’s claims against the “AddVideoPolicy” policy:
[HttpPost]
[Route ("videos/add")]
[Authorize]
public async Task<IActionResult> AddVideo ([FromBody] VideoVM video) {

    var authorizationResult = await _authorizationService
        .AuthorizeAsync (User, video, "AddVideoPolicy");

    if (authorizationResult.Succeeded) {
        VideoRepository.Videos.Add (video);
        return Ok ();
    } else {
        return new ForbidResult ();
    }
}
The default Authorize attribute uses the DefaultAuthorizationHandler we have talked about and ensures the user is Authenticated. Last but not least, we use an instance of IAuthorizationService and check if the user has the permission to add the video to our streaming platform. Click the Add Video button on the left and try to post a video with a category that you aren’t registered at. Confirm that you get redirected to the Access Denied view. Try again but this time select a category for which you are already registered. The video should be posted successfully.
That’s it we finished! Hopefully you have understood how authorization works under the hood and how to use different types of authorization to prohibit unauthorized access to your resources.
In case you find my blog’s content interesting, register your email to receive notifications of new posts and follow chsakell’s Blog on its Facebook or Twitter accounts.
| .NET Web Application Development by Chris S. | |||

|

|
||

|
|||
Categories: asp.net core, Best practices

Thanks been waiting for this part.
got a question,
for data authorization i.e. to stop one user from accessing another users data. Would we need to use Imperative authorization?
Why do you write this line loggedInUserTask.Wait ();? Wouldn’t it work without it?