
So, you’ve decided to use Blazor, but you’re not sure which hosting model to use: Client (WebAssembly) or Server (SignalR-based). Wouldn’t it be great if you could write one version of your app that can run as either a WebAssembly or Server-based Blazor app? With a few tweaks, and by following a few design guidelines, you can.
One of the side benefits of this technique is that you can debug your client-side Blazor apps in Visual Studio, something that can’t be done at the time of this writing. That’s because all the code in your Web Assembly project is actually running on the server.
I first learned of this pattern at NDC London 2020 in Steve Sanderson’s Blazor talk. The secret sauce is to add a reference from a Server-Side Blazor app to a Client-Side Blazor app, and then register the App component in the Server as a reference to the Client-side App component.
Follow these steps and you’ll see for yourself how this could be a game-changer. The complete solution is available for download here.
Prerequisites
Start by following the instructions in the Microsoft Docs for getting started with Blazor. Install the WebAssembly template as described.
Create a new Blazor WebAssembly App named BlazorWasm
Make sure to check off “ASP.NET Core hosted”

Name your app BlazorWasm

Select Blazor WebAssembly App and check off “ASP.NET Core hosted”
Add a Blazor Server App to the solution named BlazorServer

Name the project BlazorServer

This time, select Blazor Server App
Add a reference from BlazorServer to BlazorWasm.Client and BlazorWasm.Shared
In the BlazorServer project, right click on the project name.
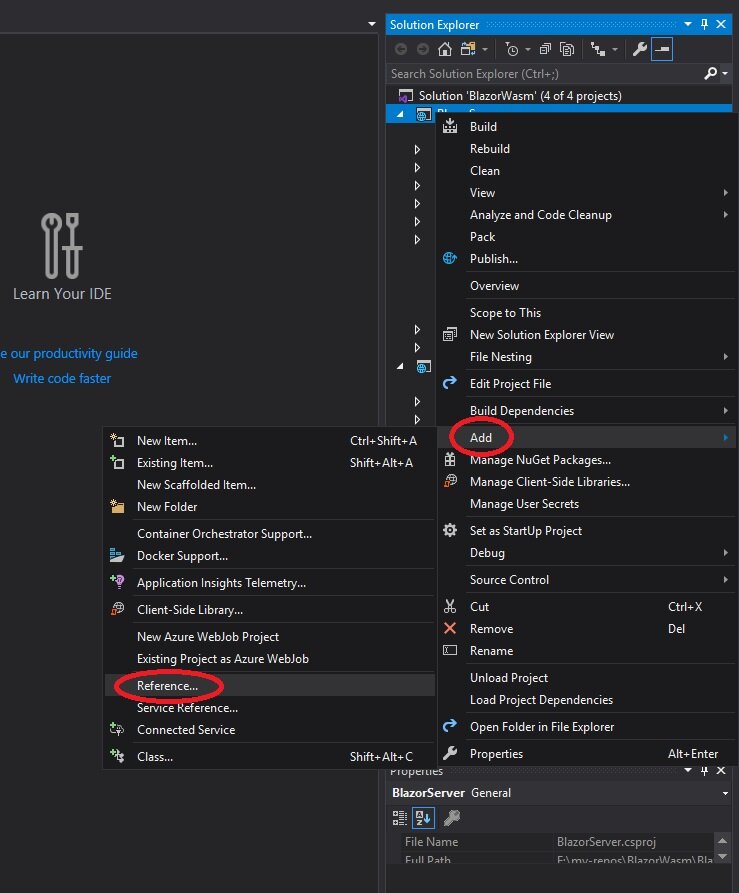
From the BlazorServer project, select Add -> Reference
Then select the BlazorWasm.Client and BlazorWasm.Shared projects from the Projects menu.

Select both BlazorWasm.Client and BlazorWasm.Shared
Delete Pages in Server app
Now the fun begins. Delete Counter.razor, Error.razor, FetchData.razor, and Index.razor from the BlazorServer project.

Delete these four pages
Change the Server App Component to Client App Component
In the BlazorServer project, open _Hosts.cshtml, locate the <app> tag, and change the component definition from this:
<component type="typeof(App)" render-mode="ServerPrerendered" />to this
<component type="typeof(BlazorWasm.Client.App)" render-mode="Server" />
Change <app> component to reference the client
Set Multiple Start Projects
In order to test this, we have to run the WASM server, which loads the WebAssembly client, and the BlazorServer Server-side project as well.
Right-click on the Solution at the top of the Solution Explorer, and Select Properties. Under Common Properties -> Startup Project select “Multiple Startup Projects”, then set the Action for BlazorServer and BlazorWasm.Server to “Start”

Rebuild All and Run
You will see two tabs: BlazorServer and BlazorWasm. Both look exactly the same. Try using the Counter page from both. Try going to the Fetch Data page on both. Uh oh. Exception!

The Server app doesn’t know about HttpClient.
This Exception illustrates how you will need to design your app from now on. The HttpClient class is available in the BlazorWasm.Client project by default, but not in the BlazorServer project.
Here’s the rule:
In order to achieve reusability between these two projects, they must each have references to the same external resources: projects, packages, scripts, etc.
So, we have to add a scoped HttpClient service to the BlazorServer project. Open the startup.cs file and add the following to the ConfigureServices method:
services.AddScoped<System.Net.Http.HttpClient>();We’re not done yet. Take a look at the FetchData.razor file in BlazorWasm.Client. It’s trying to access an API controller that’s in the same url scope. In order for this to work in both client and server, we have to be more explicit.
In the BlazorWasm.Server project, expand Properties, and then click on launchSettings.json. Copy the SSL port. We’re going to need that.

Change the controller URL in FetchData.razor
In the BlazorWasm.Client project, open FetchData.razor under the Pages folder, and change the URL from "WeatherForecast" to “https://localhost:[port]/WeatherForecast” replacing “[port]” with the SSL port from launchSerttings.json:
@code{
    private WeatherForecast[] forecasts;
    protected override async Task OnInitializedAsync()
    {
        string url = "https://localhost:44306/WeatherForecast";
        forecasts = await Http.GetJsonAsync<WeatherForecast[]>(url);
    }
}
Now when you run the app, you can access the Weather Data from both the Server-side and Client-side blazor apps.
If you use this pattern, your server will use the exact same patterns and code that the client uses. That may not always be appropriate. So, make sure you can commit to an architecture that puts the client design first.
Other Resources
Come see me in a city near you on my Blazor Roadshow world tour
Attend my one-day online Blazor workshop to dig into Blazor big time.
Check out DevExpress Blazor Components, which are currently free.
Happy coding!