I’d like to start using Cosmos, and I’ve have a bunch of questions about it – how to create databases, how to write to it and read from it, how can I use attachments and spatial data, how can I secure it, how can I test the code that uses it…and lots more. So I’m going to write a few posts over the coming weeks which hopefully will answer these questions, starting with some basics and moving to more advanced topics in later posts.
Can I trial Cosmos to help me understand it a bit more?
Fortunately Microsoft has an answer for this – they’ve provided a Cosmos emulator, and I can trial Cosmos without going near the Azure cloud.
The official Microsoft docs on the Cosmos Emulator are fantastic – you can install it locally or use a Docker image.
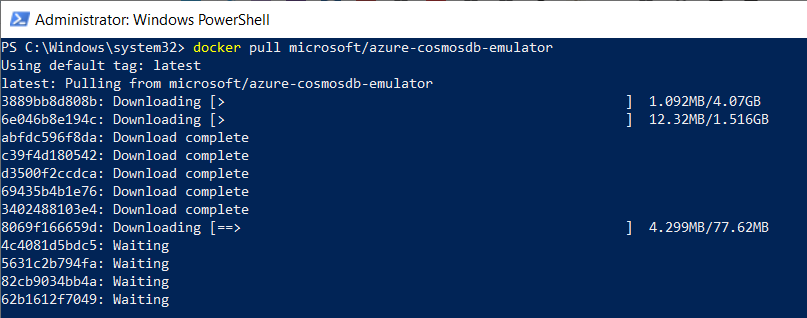
My own preference is to use the installer. I’ve tried using the Docker image and this needs to download a Windows container which totals well over 5GB, which can take a long time.
The emulator’s installer is only about 50MB and I was able to get up and running with this a lot faster than with Docker containers. There were some snags when I installed it – after trying to run it for the first time, I got this message:

But this was pretty easy to work around by just following the instruction in the message and running the emulator with the NoFirewall option:
Microsoft.Azure.Cosmos.Emulator.exe /NoFirewall
I prefer to manage the emulator from PowerShell – to do this, after installing the emulator I run the PowerShell command below to import modules that let me use some useful PowerShell commands.
Import-Module "$env:ProgramFiles\Azure Cosmos DB Emulator\PSModules\Microsoft.Azure.CosmosDB.Emulator"
And now I can control the emulator with those built in PowerShell commands.

The Cosmos Emulator’s Local Data Explorer
When I’ve started the emulator, I can browse to the URL below:
https://localhost:8081/_explorer/index.html
This opens the Emulator’s Data Explorer, which has some quickstart connection information, like connection strings and samples:

But more interestingly, I can also browse to a data explorer which allows me to browse databases in my Cosmos emulator, and collections within these databases using a SQL like language. Of course after I install the emulator, there are no databases or collections – but let’s start writing some .NET Core code to change that.

Let’s write to, and read from, some Cosmos Databases and Collections with .NET Core
I’m going to write a very simple application to interact with the Cosmos Emulator. This isn’t production ready code – this is just to examine how we might carry out some common database operations using .NET Core and Azure Cosmos.
I’m using Visual Studio 2019 with the .NET Core 3.0 preview (3.0.100-preview-010184), and I’ve created an empty .NET Core Console application.
My sample application will be to store information about interesting places near me – so I’ve chosen to create a Cosmos database with the title “LocalLandmarks”. I’m going to create a collection in this database for natural landmarks, and in this first blog I’m only going to store the landmark name.
From my application, I need to install a NuGet package to access the Azure Cosmos libraries.
Install-Package Microsoft.Azure.DocumentDB.Core
First let’s set up some parameters and objects:
- Our Cosmos Emulator endpoint is just https://localhost:8081;
- We know from the Data Explorer that the emulator key is (this is the same for everyone that uses the emulator):
C2y6yDjf5/R+ob0N8A7Cgv30VRDJIWEHLM+4QDU5DE2nQ9nDuVTqobD4b8mGGyPMbIZnqyMsEcaGQy67XIw/Jw==
- I’m going to call my database “LocalLandmarks”;
- I’m going to call the collection of natural landmarks “NaturalSites”;
- My POCO for natural landmarks can be very simple for now:
namespace CosmosEmulatorSample
{
    public class NaturalSite
    {
        public string Name { get; set; }
    }
}
So I can specify a few static readonly strings for my application:
private static readonly string CosmosEndpoint = "https://localhost:8081";
private static readonly string EmulatorKey = "C2y6yDjf5/R+ob0N8A7Cgv30VRDJIWEHLM+4QDU5DE2nQ9nDuVTqobD4b8mGGyPMbIZnqyMsEcaGQy67XIw/Jw==";
private static readonly string DatabaseId = "LocalLandmarks";
private static readonly string NaturalSitesCollection = "NaturalSites";
We can create a client to connect to our Cosmos Emulator using our specified parameters and the code below:
// Create the client connection
var client = new DocumentClient(
    new Uri(CosmosEndpoint),
    EmulatorKey,
    new ConnectionPolicy
    {
        ConnectionMode = ConnectionMode.Direct,
        ConnectionProtocol = Protocol.Tcp
    });
And now using this client we can create our “LocalLandmarks” database.
I’ve used the “Result” method to make many of the asychronous functions into synchronous functions for simplicity in this introductory post.
// Create a new database in Cosmos
var databaseCreationResult = client.CreateDatabaseAsync(new Database { Id = DatabaseId }).Result;
Console.WriteLine("The database Id created is: " + databaseCreationResult.Resource.Id);
Within this database, we can also create a collection to store our natural landmarks.
// Now initialize a new collection for our objects to live inside
var collectionCreationResult = client.CreateDocumentCollectionAsync(
    UriFactory.CreateDatabaseUri(DatabaseId),
    new DocumentCollection { Id = NaturalSitesCollection }).Result;

Console.WriteLine("The collection created has the ID: " + collectionCreationResult.Resource.Id);
So let’s declare and initialize a NaturalSite object – an example of a natural landmark near me is the Giant’s Causeway.
// Let's instantiate a POCO with a local landmark
var giantsCauseway = new NaturalSite { Name = "Giant's Causeway" };
And I can pass this object to the Cosmos client’s “CreateDocumentAsync” method to write this to Cosmos, and I can specify the database and collection that I’m targeting in this method also.
// Add this POCO as a document in Cosmos to our natural site collection
var itemResult = client
    .CreateDocumentAsync(
        UriFactory.CreateDocumentCollectionUri(DatabaseId, NaturalSitesCollection), giantsCauseway)
    .Result;

Console.WriteLine("The document has been created with the ID: " + itemResult.Resource.Id);
At this point I could look at the Cosmos Emulator’s Data Explorer and see this in my database, as shown below:

Finally I can read back from this NaturalSite collection by ID – I know the ID of the document I just created in Cosmos, so I can just call the Cosmos client’s “ReadDocumentAsync” method and specify the database Id, the collection I want to search in, and the document Id that I want to retrieve. I convert the results to a NaturalSite POCO, and then I can read properties back from it.
// Use the ID to retrieve the object we just created
var document = client
    .ReadDocumentAsync(
        UriFactory.CreateDocumentUri(DatabaseId, NaturalSitesCollection, itemResult.Resource.Id))
    .Result;

// Convert the document resource returned to a NaturalSite POCO
NaturalSite site = (dynamic)document.Resource;

Console.WriteLine("The returned document is a natural landmark with name: " + site.Name);
I’ve uploaded this code to GitHub here.
Wrapping up
In this post, I’ve written about the Azure Cosmos emulator which I’ve used to experiment with coding for Cosmos. I’ve written a little bit of very basic C# code which uses the Cosmos SDK to create databases and collections, write to these collections, and also read documents from collections by primary key. Of course this query might not be that useful – we probably don’t know the IDs of the documents saved to the database (and probably don’t care either as it’s non-semantic). In the next part of this series, I’ll write about querying Cosmos documents by object properties using .NET.
About me: I regularly post about Microsoft technologies and .NET – if you’re interested, please follow me on Twitter, or have a look at my previous posts here. Thanks!

Hi Jeremy, very interesting post. I was looking for good examples of Cosmos DB and I think I finally found it 😉
Thanks!