This article shows how to implement the OAuth 2.0 Device Flow for Browserless and Input Constrained Devices in an ASP.NET Core application. The tokens are then saved to a cookie for later usage. IdentityServer4 is used to implement the secure token server.
Code: https://github.com/damienbod/AspNetCoreHybridFlowWithApi
History
2020-12-11 Updated to .NET 5
2019-10-06 Updated to .NET Core 3.0
2019-02-24 Updated packages, API calls
Note: The code in the this blog was built using the example from leastprivilege’s github repo AspNetCoreSecuritySamples. This was then adapted for an ASP.NET Core Razor Page application.
Creating the Client Login
The ASP.NET Core application is setup to login using the OAuth Device flow. When the user clicks the login, 4 things happen, the device code, user code is requested from the server, the device code is saved to an ASP.NET Core session, and the login page starts to poll the STS for a successful login and the QRCode is displayed so that the user can login with a mobile device, or just enter the login URL directly.
The Login OnGetAsync method, resets the user session, and signs out, if already signed in. Cookie Authentication is used to save the session once logged in. The device flow is started by calling the BeginLogin method. When the method completes, the session data is set, and the page view is returned.
public async Task OnGetAsync()
{
	HttpContext.Session.SetString("DeviceCode", string.Empty);

	await HttpContext.SignOutAsync(CookieAuthenticationDefaults.AuthenticationScheme);

	var deviceAuthorizationResponse = await _deviceFlowService.BeginLogin();
	AuthenticatorUri = deviceAuthorizationResponse.VerificationUri;
	UserCode = deviceAuthorizationResponse.UserCode;

	if (string.IsNullOrEmpty(HttpContext.Session.GetString("DeviceCode")))
	{
		HttpContext.Session.SetString("DeviceCode", deviceAuthorizationResponse.DeviceCode);
		HttpContext.Session.SetInt32("Interval", deviceAuthorizationResponse.Interval);
	}
}
The BeginLogin sends a code request using the RequestDeviceAuthorizationAsync method from the IdentityModel Nuget package. The required scopes are added to the request, and the ClientId is set to match the server configuration for this client.
internal async Task<DeviceAuthorizationResponse> BeginLogin()
{
	var client = _clientFactory.CreateClient();

	var disco = await HttpClientDiscoveryExtensions.GetDiscoveryDocumentAsync(client, _authConfigurations.Value.StsServer);

	if (disco.IsError)
	{
		throw new ApplicationException($"Status code: {disco.IsError}, Error: {disco.Error}");
	}

	var deviceAuthorizationRequest = new DeviceAuthorizationRequest
	{
		Address = disco.DeviceAuthorizationEndpoint,
		ClientId = "deviceFlowWebClient"
	};
	deviceAuthorizationRequest.Scope = "email profile openid";
	var response = await client.RequestDeviceAuthorizationAsync(deviceAuthorizationRequest);

	if (response.IsError)
	{
		throw new Exception(response.Error);
	}

	return response;
}
The ASP.NET Core session and the Cookie authentication are setup in the Startup class. The session is added using the AddSession extension method, and then added using the UseSession in the Configure method.
Cookie Authentication is added to save the logged-in user. The UseAuthentication method is added to the Configure method. The IHttpContextAccessor is added to the IoC so that we can show the user name in the razor page views.
using Microsoft.AspNetCore.Authentication.Cookies;
using Microsoft.AspNetCore.Builder;
using Microsoft.AspNetCore.Hosting;
using Microsoft.AspNetCore.Http;
using Microsoft.AspNetCore.Mvc;
using Microsoft.Extensions.Configuration;
using Microsoft.Extensions.DependencyInjection;
using Microsoft.Extensions.Hosting;
using System;

namespace DeviceFlowWeb
{
    public class Startup
    {
        public Startup(IConfiguration configuration)
        {
            Configuration = configuration;
        }

        public IConfiguration Configuration { get; }

        // This method gets called by the runtime. Use this method to add services to the container.
        public void ConfigureServices(IServiceCollection services)
        {
            services.AddScoped<DeviceFlowService>();
            services.AddHttpClient();
            services.Configure<AuthConfigurations>(Configuration.GetSection("AuthConfigurations"));

            services.AddDistributedMemoryCache();

            services.AddSession(options =>
            {
                // Set a short timeout for easy testing.
                options.IdleTimeout = TimeSpan.FromSeconds(60);
                options.Cookie.HttpOnly = true;
            });

            services.Configure<CookiePolicyOptions>(options =>
            {
                // This lambda determines whether user consent for non-essential cookies is needed for a given request.
                options.CheckConsentNeeded = context => true;
                options.MinimumSameSitePolicy = SameSiteMode.None;
            });

            var authConfigurations = Configuration.GetSection("AuthConfigurations");
            var stsServer = authConfigurations["StsServer"];

            services.AddAuthentication(options =>
            {
                options.DefaultScheme = CookieAuthenticationDefaults.AuthenticationScheme;
            })
            .AddCookie();

            services.AddAuthorization();
            services.AddSingleton<IHttpContextAccessor, HttpContextAccessor>();

            services.AddRazorPages();
        }

        // This method gets called by the runtime. Use this method to configure the HTTP request pipeline.
        public void Configure(IApplicationBuilder app, IWebHostEnvironment env)
        {
            if (env.IsDevelopment())
            {
                app.UseDeveloperExceptionPage();
            }
            else
            {
                app.UseExceptionHandler("/Error");
                // The default HSTS value is 30 days. You may want to change this for production scenarios, see https://aka.ms/aspnetcore-hsts.
                app.UseHsts(hsts => hsts.MaxAge(365).IncludeSubdomains());
            }

            //Registered before static files to always set header

            app.UseXContentTypeOptions();
            app.UseReferrerPolicy(opts => opts.NoReferrer());
            app.UseXXssProtection(options => options.EnabledWithBlockMode());
            app.UseXfo(options => options.Deny());

            app.UseStaticFiles();
            app.UseCookiePolicy();
            app.UseSession();

            app.UseStaticFiles();

            app.UseRouting();

            app.UseAuthentication();
            app.UseAuthorization();

            app.UseEndpoints(endpoints =>
            {
                endpoints.MapRazorPages();
            });
        }
    }
}
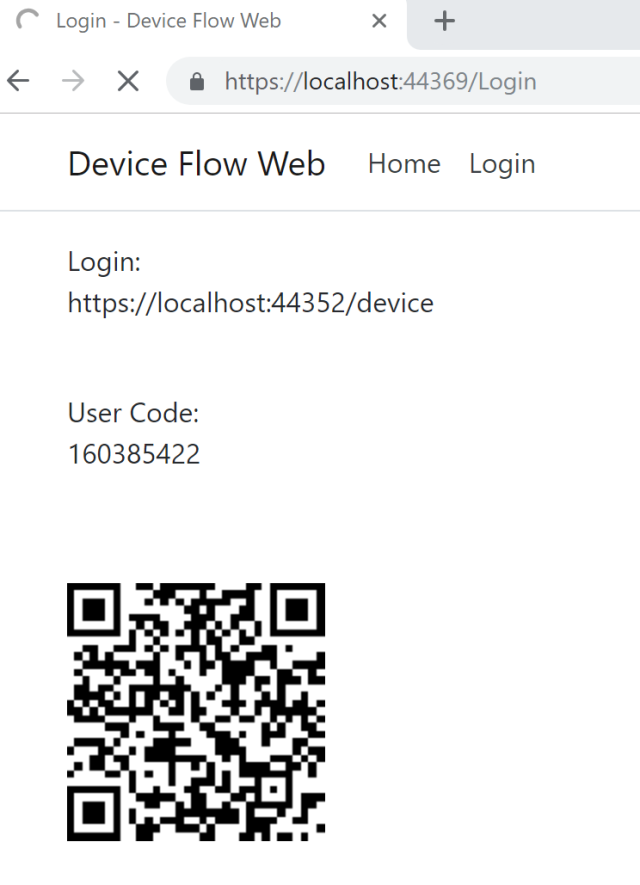
The Login Razor Page implements an OnPost method, which polls the server for a successful login. This is called using Javascript as soon as the page opens. The results from the OnGet are displayed in this view. The login link is displayed using a QRCode so that a mobile device could scan this and login. The user code is also displayed, which needs to be entered when logging in. The button to get the tokens is not required, this is just displayed for the demo.
@page
@model DeviceFlowWeb.Pages.LoginModel
@{
    ViewData["Title"] = "Login";
    Layout = "~/Pages/Shared/_Layout.cshtml";
}


Login: <p>@Model.AuthenticatorUri</p>

<br />

User Code: <p>@Model.UserCode</p>
<br />
<br />

<div id="qrCode"></div>
<div id="qrCodeData" data-url="@Html.Raw(Model.AuthenticatorUri)"></div>

<br />
<br />

<form data-ajax="true"  method="post" data-ajax-method="POST">
    <button class="btn btn-secondary" name="begin_token_check" id="begin_token_check" type="submit">Get tokens</button>
</form>

@section scripts {
<script src="~/js/qrcode.min.js"></script>
<script type="text/javascript">
        new QRCode(document.getElementById("qrCode"),
            {
                text: "@Html.Raw(Model.AuthenticatorUri)",
                width: 150,
                height: 150
            });

    $(document).ready(() => {
        document.getElementById('begin_token_check').click();
    });

</script>
}
The OnPostAsync method uses the RequestTokenAsync method from the service to get the tokens. This polls the server if a valid device code exists and tries to get the tokens. If the user has logged in, the tokens will be returned. This code could be optimized to remove the thread sleep calls, and use a background service.
internal async Task<TokenResponse> RequestTokenAsync(string deviceCode, int interval)
{
	var client = _clientFactory.CreateClient();

	var disco = await HttpClientDiscoveryExtensions.GetDiscoveryDocumentAsync(client, _authConfigurations.Value.StsServer);

	if (disco.IsError)
	{
		throw new ApplicationException($"Status code: {disco.IsError}, Error: {disco.Error}");
	}

	while (true)
	{
		if(!string.IsNullOrWhiteSpace(deviceCode))
		{
			var response = await client.RequestDeviceTokenAsync(new DeviceTokenRequest
			{
				Address = disco.TokenEndpoint,
				ClientId = "deviceFlowWebClient",
				DeviceCode = deviceCode
			});

			if (response.IsError)
			{
				if (response.Error == "authorization_pending" || response.Error == "slow_down")
				{
					Console.WriteLine($"{response.Error}...waiting.");
					await Task.Delay(interval * 1000);
				}
				else
				{
					throw new Exception(response.Error);
				}
			}
			else
			{
				return response;
			}
		}
		else
		{
			await Task.Delay(interval * 1000);
		}
	}
}
Adding the token claims to the Cookie
The OnPostAsync method calls the RequestTokenAsync method, using the session data. Once the tokens are returned, these are added to a cookie and used to add the claims to the auth cookie, and the user in logged in. The HttpContext.SignInAsync method is used for this with the claims from the tokens.
public async Task<IActionResult> OnPostAsync()
{
	var deviceCode = HttpContext.Session.GetString("DeviceCode");
	var interval = HttpContext.Session.GetInt32("Interval");

	if(interval.GetValueOrDefault() <= 0)
	{
		interval = 5;
	}

	var tokenresponse = await _deviceFlowService.RequestTokenAsync(deviceCode, interval.Value);

	if (tokenresponse.IsError)
	{
		ModelState.AddModelError(string.Empty, "Invalid login attempt.");
		return Page();
	}

	var claims = GetClaims(tokenresponse.IdentityToken);

	var claimsIdentity = new ClaimsIdentity(
		claims,
		CookieAuthenticationDefaults.AuthenticationScheme,
		"name",
		"user");

	var authProperties = new AuthenticationProperties();

	// save the tokens in the cookie
	authProperties.StoreTokens(new List<AuthenticationToken>
	{
		new AuthenticationToken
		{
			Name = "access_token",
			Value = tokenresponse.AccessToken
		},
		new AuthenticationToken
		{
			Name = "id_token",
			Value = tokenresponse.IdentityToken
		}
	});

	await HttpContext.SignInAsync(
		CookieAuthenticationDefaults.AuthenticationScheme,
		new ClaimsPrincipal(claimsIdentity),
		authProperties);

	return Redirect("/Index");
}

private IEnumerable<Claim> GetClaims(string token)
{
	var validJwt = new JwtSecurityToken(token);
	return validJwt.Claims;
}
Logout
Logout is implemented using a Razor Page, and this just cleans up the auth cookies using the HttpContext.SignOutAsync method.
using Microsoft.AspNetCore.Authentication;
using Microsoft.AspNetCore.Authentication.Cookies;
using Microsoft.AspNetCore.Mvc;
using Microsoft.AspNetCore.Mvc.RazorPages;
using System.Threading.Tasks;

namespace DeviceFlowWeb.Pages
{
    public class LogoutModel : PageModel
    {
        public async Task<IActionResult> OnGetAsync()
        {
            await HttpContext.SignOutAsync(CookieAuthenticationDefaults.AuthenticationScheme);

            return Redirect("/SignedOut");
        }
    }
}
IdentityServer4 client configuration
The Device Flow client is configured using the grant type DeviceFlow. The profile claims are added to the id_token and no secret is required, as the web application client would run on a device, in an untrusted zone, so it cannot be trusted to keep a secret. The ClientId value must match the configuration on the client.
new Client
{
	ClientId = "deviceFlowWebClient",
	ClientName = "Device Flow Client",

	AllowedGrantTypes = GrantTypes.DeviceFlow,
	RequireClientSecret = false,

	AlwaysIncludeUserClaimsInIdToken = true,
	AllowOfflineAccess = true,

	AllowedScopes =
	{
		IdentityServerConstants.StandardScopes.OpenId,
		IdentityServerConstants.StandardScopes.Profile,
		IdentityServerConstants.StandardScopes.Email
	}
}
Running the APP
On the Device App and click the login:
Scan the QRCode and open in a browser, use the link:
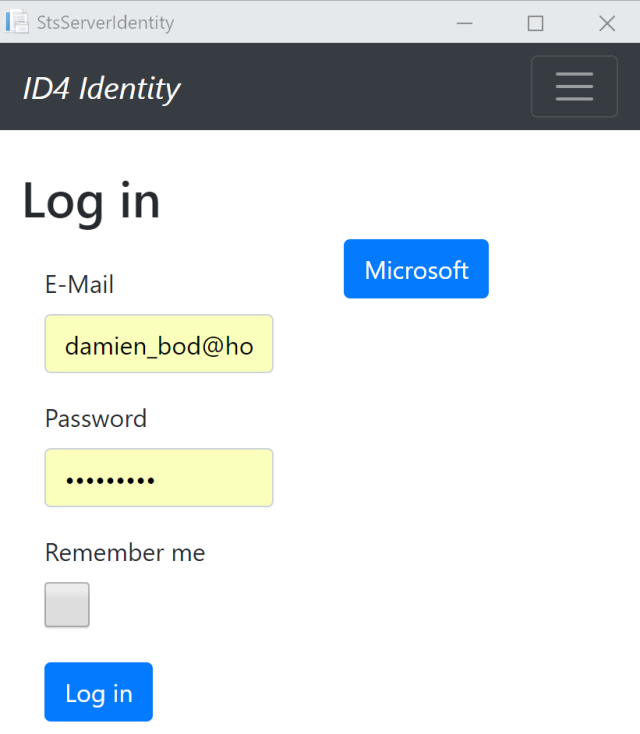
Login with user email, or Microsoft account:
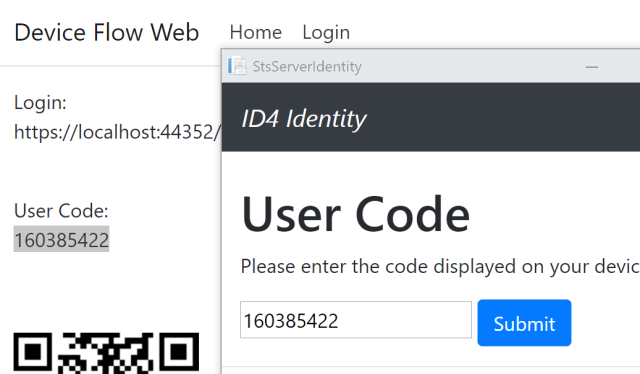
Enter the user code displayed on the Device Login page:
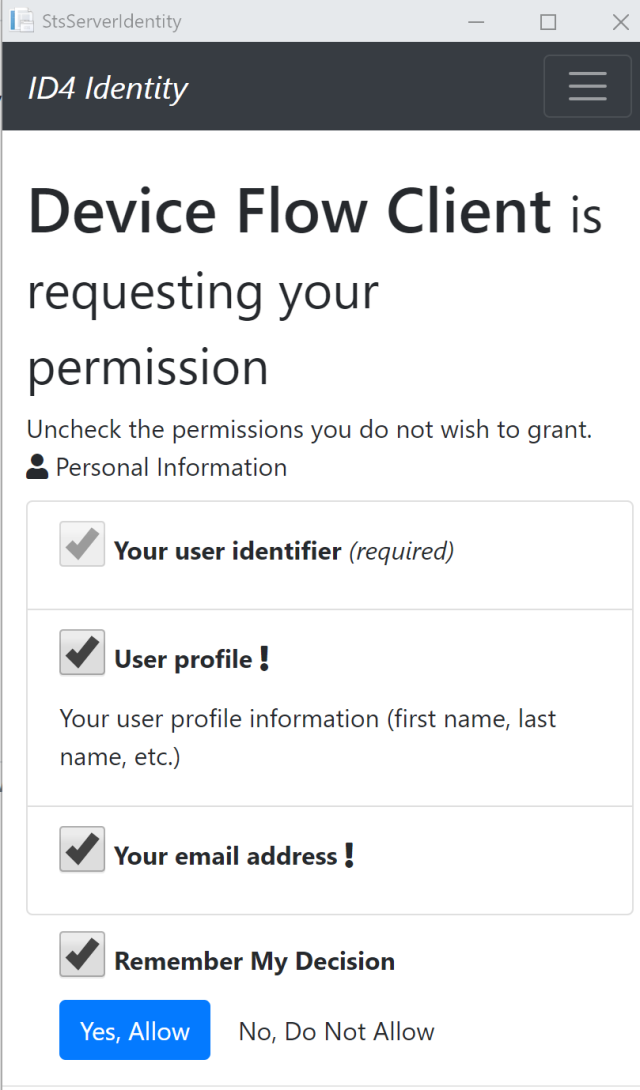
Give your consent:
And the Device is now logged in, received the tokens, and added them to the auth cookie.
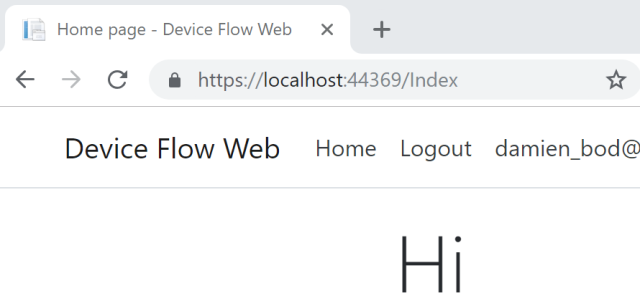
You could now use the tokens in the standard way, to call APIs etc.
Links
https://docs.microsoft.com/en-us/aspnet/core/security/authentication/cookie?view=aspnetcore-2.2
https://tools.ietf.org/wg/oauth/draft-ietf-oauth-device-flow/
https://github.com/leastprivilege/AspNetCoreSecuritySamples/tree/aspnetcore21/DeviceFlow


[…] ASP.NET Core OAuth Device Flow Client with IdentityServer4 – Damien Bowden […]
Why are you using Thread.Sleep on an asynchronous method? What’s wrong with await Task.Delay?
Hi Paulo
yes this is incorrect and I should clean it up.
Thanks Damien
[…] via ASP.NET Core OAuth Device Flow Client with IdentityServer4 — Software Engineering […]
When I hit “Yes, allow” the RequestDeviceTokenAsync still returns an error. I have my IdentityServer 4 hooked up to EF. Am I able to check anything to see if the post from the consent form persisted?