LayIM.AspNetCore Middleware 开发日记(七)Asp.Net.Core.SignalR闪亮登场
前言
前几篇介绍了整个中间件的构成,路由,基本配置等等.基本上没有涉及到通讯部分。不过已经实现了融云的通讯功能,由于是第三方的就不在单独去写。正好.NET Core SignalR已经出来好久了,于是乎赶紧对接上。可以先看一下之前的文章:.Net Core SignalR初体验。
Hub设计
Hub我采用了 Hub<T>,然后只定义了一个 Receive方法。
namespace LayIM.AspNetCore.IM.SignalR
{
    public interface ILayIMClient
    {
        Task Receive(object message);
    }
}
   // Hub端代码
  public Task SendMessage(string targetId, string message)
    {
           //这里就可以调用 Receive方法
            return Clients.Caller.Receive(message);
    }
那么这里我们要做的就是,先连接上服务器在实现详细业务。下面我们要做两件事情:
- 修改Startup,注册SignalR
- 增加
Javascript客户端
由于是将SignalR拆分到LayIM.AspNetCore.IM.SignalR项目中,所以注册服务端代码做了小小封装。在SignalRServiceExtensions文件中:
        /// <summary>
        /// 使用SignalR通信
        /// </summary>
        /// <param name="services"></param>
        /// <param name="setConfig"></param>
        public static IServiceCollection AddSignalR(this IServiceCollection services, Action<LayIMHubOptions> configure)
        {
            var options = new LayIMHubOptions();
            configure?.Invoke(options);
            var signalRServerBuilder = services.AddSignalR(options.HubConfigure);
            //增加Redis配置
            if (options.UseRedis)
            {
                signalRServerBuilder.AddRedis(options.RedisConfiguration, options.RedisConfigure);
            }
            //AddSignalR must be called before registering your custom SignalR services.
            services.AddSingleton<ILayIMAppBuilder, SignalRAppBuilder>();
            //获取用户ID
            services.AddSingleton<IUserIdProvider, LayIMUserIdProvider>();


            LayIMServiceLocator.SetServiceProvider(services.BuildServiceProvider());
            return services;
        }
那么在客户端 Startup 调用的时候就可以这么写了:
 //注册LayIM的默认服务
            services.AddLayIM(() =>
            {
                return new MyUserFactory();
            }).AddSignalR(options =>
                {
                    options.HubConfigure = hubOptions =>
                    {
                        hubOptions.EnableDetailedErrors = true;
                        hubOptions.KeepAliveInterval = TimeSpan.FromSeconds(5);
                    };
                    //使用Redis
                    options.RedisConfiguration = "192.168.1.225:6379"
                })
                .AddSqlServer(connectionString);
然后Configure方法中:
    public void Configure(IApplicationBuilder app, IHostingEnvironment env)
        {
            ....其他代码
            //使用LayIM,自定义配置
            app.UseLayIM(options =>
            {
                options.ServerType = ServerType.SignalR;
            });
            ....其他代码
        }
到这里可能大家有疑问,没有看到添加 AddSignalR方法。由于是封装了很多细节,所以,这一部分已经写到了UselayIM代码中。
 public class SignalRAppBuilder : ILayIMAppBuilder
    {
        public void Build(IApplicationBuilder builder)
        {
            builder.UseSignalR(route => {
                route.MapHub<LayIMHub>("/layimHub", connectionOptions =>
                {

                });
            });
        }
    }
其实也就对应了上文中services.AddSingleton<ILayIMAppBuilder, SignalRAppBuilder>();这句代码。那么到这里呢,SignalR的服务该注册的也注册了,该添加的也添加了,下面就编写(JS)客户端代码。
SignalR Javascript客户端
这里我们根据官方文档里写就可以。连接部分核心代码:
            let hubRoute = "layimHub";
            let protocol = new signalR.JsonHubProtocol();
            var options = {};
            connection = new signalR.HubConnectionBuilder()
                .configureLogging(signalR.LogLevel.Trace)
                .withUrl(hubRoute, options)
                .withHubProtocol(protocol)
                .build();
            //receive message
            connection.on('Receive', im.handle);
            connection.onclose(function (e) {
                if (e) {

                }
                log('连接已关闭' + e ? e : '');
            });
            connection.start()
                .then(function () {
                    //连接成功
                })
                .catch(function (err) {
                    log('服务器连接失败:' + err);
                });
运行一下程序。没问题

那么到这里,我们就可以对接LayIM的实际业务了.这一段其实和融云思路差不多。首先,我们要确保消息能够发送到后端,那么我们修改一下监听LayIM发送消息部分的代码:
 layim.on('sendMessage', function (data) {
        //调用socket方法,发送消息
       im.sendMsgWithQueue(data);
 });
调用服务端发送方法:
     if (im.connected) {
            this.invoke(connection, 'SendMessage', targetId, msg);
      }
invoke方法
 invoke: function () {
       if (!im.connected) {
           return;
       }
       var argsArray = Array.prototype.slice.call(arguments);
       connection.invoke.apply(connection, argsArray.slice(1))
           .then(function (result) {
               if (result) {
                   log(result);
               }
            }).catch(function (err) {
                    log(err);
           });
     },
可以看到,调用了服务端的 SendMessage方法,那么这里就要回到Hub代码部分了。我们在Hub端新增方法SendMessage,然后定义好接收变量。如下:
 public class LayIMMessage
    {
        [JsonProperty("id")]
        public long Id { get; set; }
        [JsonProperty("avatar")]
        public string Avatar { get; set; }
        [JsonProperty("type")]
        public string Type { get; set; }
        [JsonProperty("content")]
        public string Content { get; set; }
        [JsonProperty("username")]
        public string UserName { get; set; }
    }
 public Task SendMessage(string targetId, LayIMMessage message)
        {
            if (string.IsNullOrEmpty(targetId) || message == null)
            {
                return Task.CompletedTask;
            }
            var toClientMessage = LayIMToClientMessage<LayIMMessage>.Create(message, LayIMMessageType.ClientToClient);
            //如果消息类型是群聊,调用OthersInGroup方法
            if (message.Type == LayIMConst.TYPE_GROUP)
            {
                return Clients.OthersInGroup(targetId).Receive(toClientMessage);
            }
            else
            {
                //如果消息类型是单聊,直接调用User
                //或者 Clients.Client([connectionId])
                return Clients.User(targetId).Receive(toClientMessage);
            }
        }
这里有两个细节要注意,第一:用户连接成功之后需要加入到Group,第二,自定义UserIdProvider。 那么第一个,就是我们要在用户连接成功之后调用一下加入群组的方法,同样,用户下线之后要移除掉。IGroupManager中定义了如下两个方法:
namespace Microsoft.AspNetCore.SignalR
{
    //
    // 摘要:
    //     A manager abstraction for adding and removing connections from groups.
    public interface IGroupManager
    {
        Task AddToGroupAsync(string connectionId, string groupName, CancellationToken cancellationToken = default(CancellationToken));

        Task RemoveFromGroupAsync(string connectionId, string groupName, CancellationToken cancellationToken = default(CancellationToken));
    }
}
至于自定义用户ID,很简单,我们实现接口IUserIdProvider即可。细心的同学可能在前文的代码中看到这一段了。为什么要使用重写呢?因为SignalR默认使用ConnectionId。而且每次刷新页面之后,它都是会变化的,那么如果我们改成使用绑定用户ID的话,对于直接定点推送,刷新页面是没有问题的,直接根据User对象推送即可。下面演示一下:
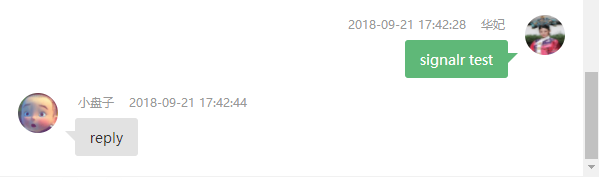
群聊的图就不贴了,一样的。那么至此SignalR的对接就结束了。是不是比Demo也难不了多少。
推送服务分离
到这里呢,我们就可以融云,SignalR自由切换了。具体细节可以查看 LayIM.AspNetCore.Demo.RongCloud,LayIM.AspNetCore.Demo.SignalR两个项目。
总结
给大家大体介绍了一下对接思路,其实有很多细节也没有展示,毕竟贴的代码已经够多了。如果小伙伴们有兴趣,可以移步:源码地址,今天就到这里啦,再见,祝大家中秋快乐
