从壹开始前后端分离【 .NET Core2.0/3.0 +Vue2.0 】框架之十 || AOP面向切面编程浅解析:简单日志记录 + 服务切面缓存
本文3.0版本文章
课前注意:
关于拦截器
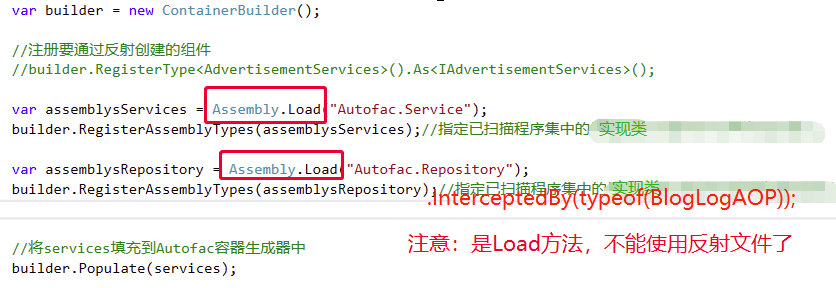
1、保证你写的autofac程序集批量依赖注入是有效的,且能正常运行;
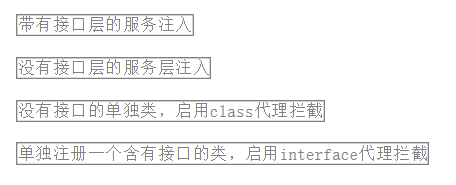
2、拦截器有一定的要求,注意被拦截的对象是单纯的类(EnableClassInterceptors),还是有接口代理模式(EnableInterfaceInterceptors),不同的方案,对应不同的方法;
3、如果被拦截的对象是单纯的类,而没有接口,除了用对应的拦截方案(上边第2点)外,还要保证拦截的方法是虚方法(代理核心就是重写);
4、代理类只要打断点能进去就代表成功;多个案例,查看我项目中的Demo:
零、今天完成的深红色部分
一、AOP 之 实现日志记录(服务层)
    public class BlogArticle
    {
        /// <summary>
        /// 主键
        /// </summary>
        /// 这里之所以没用RootEntity,是想保持和之前的数据库一致,主键是bID,不是Id
        [SugarColumn(IsNullable = false, IsPrimaryKey = true, IsIdentity = true)]
        public int bID { get; set; }
        /// <summary>
        /// 创建人
        /// </summary>
        [SugarColumn(Length = 60, IsNullable = true)]
        public string bsubmitter { get; set; }

        /// <summary>
        /// 标题blog
        /// </summary>
        [SugarColumn(Length = 256, IsNullable = true)]
        public string btitle { get; set; }

        /// <summary>
        /// 类别
        /// </summary>
        [SugarColumn(Length = int.MaxValue, IsNullable = true)]
        public string bcategory { get; set; }

        /// <summary>
        /// 内容
        /// </summary>
        [SugarColumn(IsNullable = true, ColumnDataType = "text")]
        public string bcontent { get; set; }

        /// <summary>
        /// 访问量
        /// </summary>
        public int btraffic { get; set; }

        /// <summary>
        /// 评论数量
        /// </summary>
        public int bcommentNum { get; set; }

        /// <summary>
        /// 修改时间
        /// </summary>
        public DateTime bUpdateTime { get; set; }

        /// <summary>
        /// 创建时间
        /// </summary>
        public System.DateTime bCreateTime { get; set; }
        /// <summary>
        /// 备注
        /// </summary>
        [SugarColumn(Length = int.MaxValue, IsNullable = true)]
        public string bRemark { get; set; }

        /// <summary>
        /// 逻辑删除
        /// </summary>
        [SugarColumn(IsNullable = true)]
        public bool? IsDeleted { get; set; }

    }
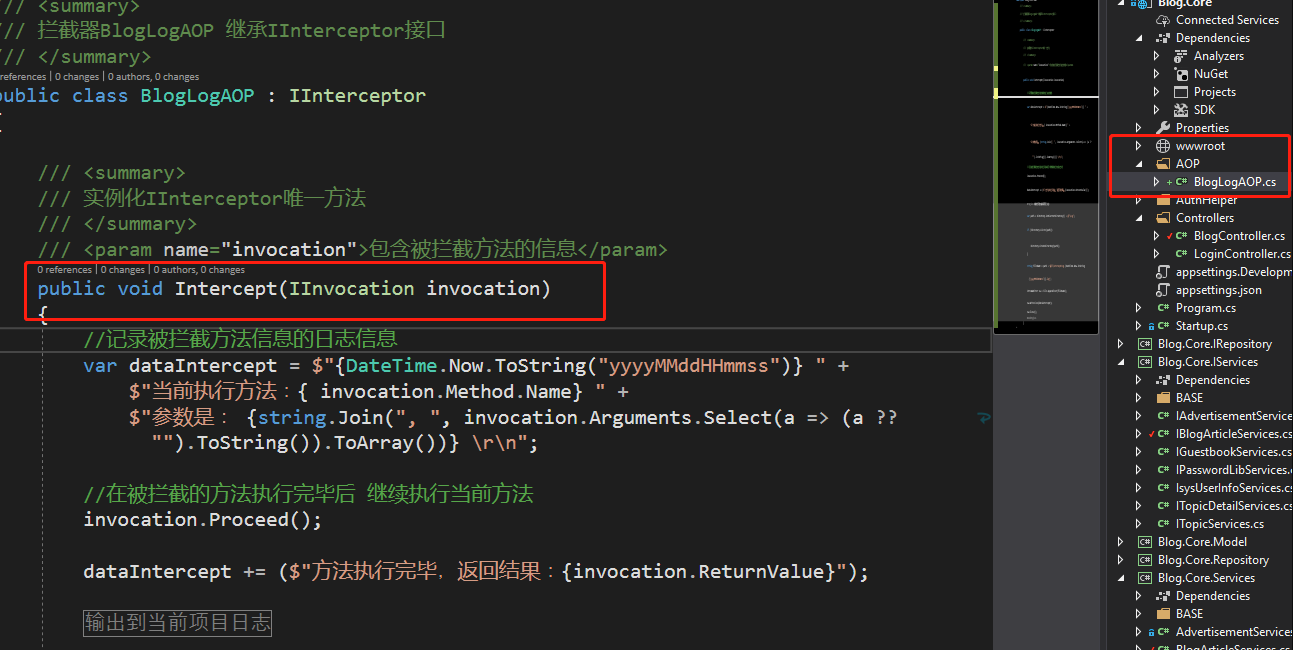
关键的一些知识点,注释中已经说明了,主要是有以下:
1、继承接口IInterceptor
2、实例化接口IINterceptor的唯一方法Intercept
3、void Proceed();表示执行当前的方法和object ReturnValue { get; set; }执行后调用,object[] Arguments参数对象
4、中间的代码是新建一个类,还是单写,就很随意了。
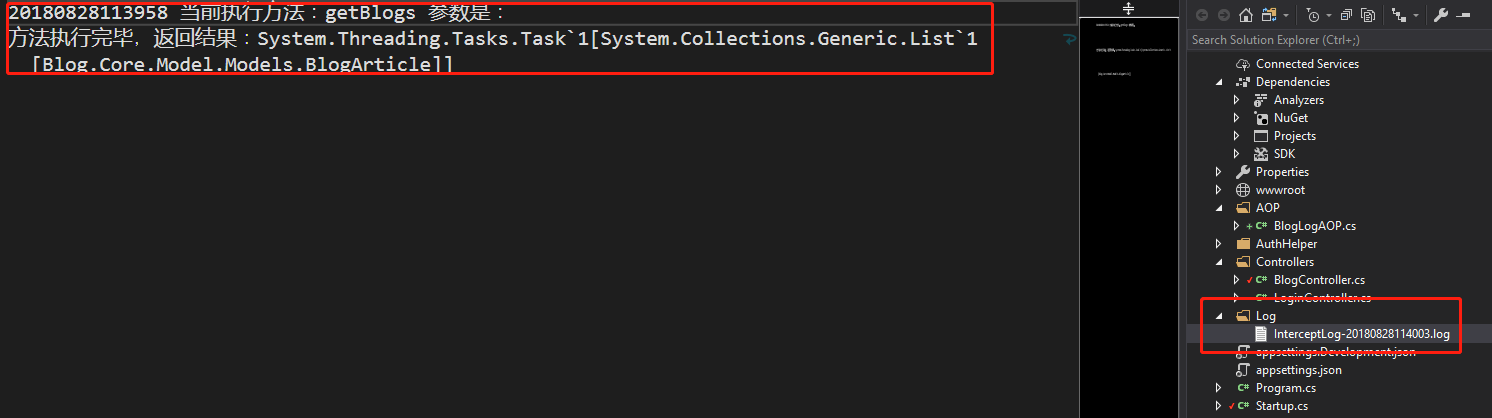
  /// <summary>
    /// 拦截器BlogLogAOP 继承IInterceptor接口
    /// </summary>
    public class BlogLogAOP : IInterceptor
    {

        /// <summary>
        /// 实例化IInterceptor唯一方法
        /// </summary>
        /// <param name="invocation">包含被拦截方法的信息</param>
        public void Intercept(IInvocation invocation)
        {
            //记录被拦截方法信息的日志信息
            var dataIntercept = $"{DateTime.Now.ToString("yyyyMMddHHmmss")} " +
                $"当前执行方法:{ invocation.Method.Name} " +
                $"参数是: {string.Join(", ", invocation.Arguments.Select(a => (a ?? "").ToString()).ToArray())} \r\n";

            //在被拦截的方法执行完毕后 继续执行当前方法
            invocation.Proceed();

            dataIntercept += ($"被拦截方法执行完毕,返回结果:{invocation.ReturnValue}");

            #region 输出到当前项目日志
            var path = Directory.GetCurrentDirectory() + @"\Log";
            if (!Directory.Exists(path))
            {
                Directory.CreateDirectory(path);
            }

            string fileName = path + $@"\InterceptLog-{DateTime.Now.ToString("yyyyMMddHHmmss")}.log";

            StreamWriter sw = File.AppendText(fileName);
            sw.WriteLine(dataIntercept);
            sw.Close();
            #endregion

        }
    }
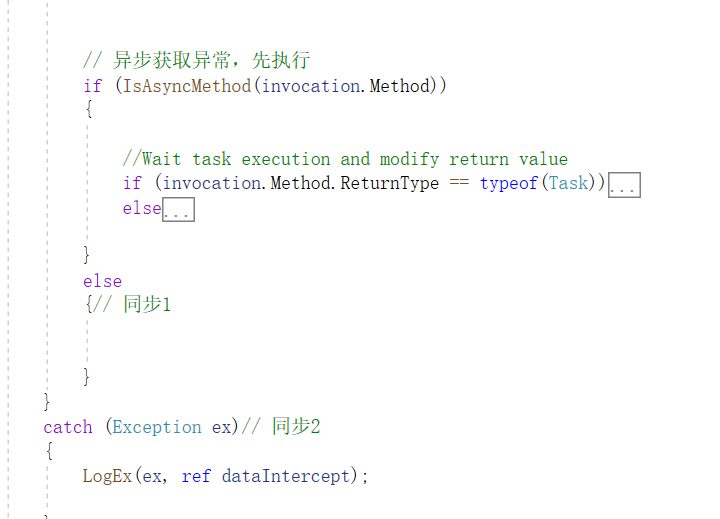
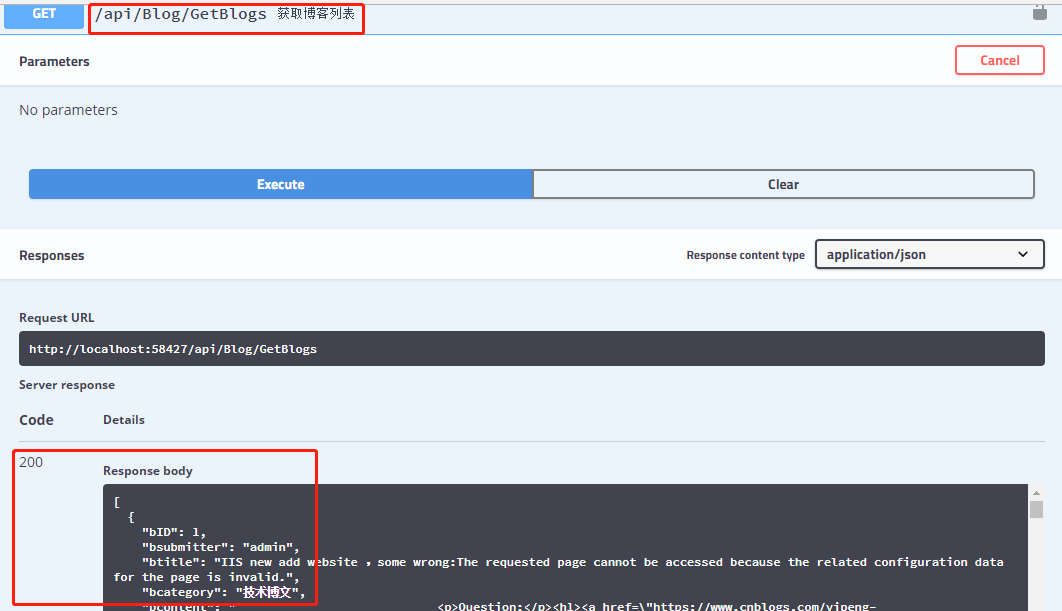
这里,面向服务层的日志记录就完成了,大家感觉是不是很平时的不一样?
二、AOP 之 实现接口数据的缓存功能
   /// <summary>
    /// 面向切面的缓存使用
    /// </summary>
    public class BlogCacheAOP : IInterceptor
    {
        //通过注入的方式,把缓存操作接口通过构造函数注入
        private ICaching _cache;
        public BlogCacheAOP(ICaching cache)
        {
            _cache = cache;
        }
        //Intercept方法是拦截的关键所在,也是IInterceptor接口中的唯一定义
        public void Intercept(IInvocation invocation)
        {
            //获取自定义缓存键
            var cacheKey = CustomCacheKey(invocation);
            //根据key获取相应的缓存值
            var cacheValue = _cache.Get(cacheKey);
            if (cacheValue != null)
            {
                //将当前获取到的缓存值,赋值给当前执行方法
                invocation.ReturnValue = cacheValue;
                return;
            }
            //去执行当前的方法
            invocation.Proceed();
            //存入缓存
            if (!string.IsNullOrWhiteSpace(cacheKey))
            {
                _cache.Set(cacheKey, invocation.ReturnValue);
            }
        }

        //自定义缓存键
        private string CustomCacheKey(IInvocation invocation)
        {
            var typeName = invocation.TargetType.Name;
            var methodName = invocation.Method.Name;
            var methodArguments = invocation.Arguments.Select(GetArgumentValue).Take(3).ToList();//获取参数列表,我最多需要三个即可

            string key = $"{typeName}:{methodName}:";
            foreach (var param in methodArguments)
            {
                key += $"{param}:";
            }

            return key.TrimEnd(':');
        }
        //object 转 string
        private string GetArgumentValue(object arg)
        {
        // PS:这里仅仅是很简单的数据类型,如果参数是表达式/类等,比较复杂的,请看我的在线代码吧,封装的比较多,当然也可以自己封装。
            if (arg is int || arg is long || arg is string)
                return arg.ToString();

            if (arg is DateTime)
                return ((DateTime)arg).ToString("yyyyMMddHHmmss");

            return "";
        }
    }


5、多个AOP执行顺序问题
在我最新的 Github 项目中,我定义了三个 AOP :除了上边两个 LogAOP和 CacheAOP 以外,还有一个 RedisCacheAOP,并且通过开关的形式在项目中配置是否启用:

那具体的执行顺序是什么呢,这里说下,就是从上至下的顺序,或者可以理解成挖金矿的形式,执行完上层的,然后紧接着来下一个AOP,最后想要回家,就再一个一个跳出去,在往上层走的时候,矿肯定就执行完了,就不用再操作了,直接出去,就像 break 一样,可以参考这个动图:

6、无接口如何实现AOP
上边我们讨论了很多,但是都是接口框架的,
比如:Service.dll 和与之对应的 IService.dll,Repository.dll和与之对应的 IRepository.dll,我们可以直接在对应的层注入的时候,匹配上 AOP 信息,但是如果我们没有使用接口怎么办?
这里大家可以安装下边的实验下:
Autofac它只对接口方法 或者 虚virtual方法或者重写方法override才能起拦截作用。
如果没有接口
案例是这样的:
如果我们的项目是这样的,没有接口,会怎么办:
    // 服务层类
   public class StudentService
    {
        StudentRepository _studentRepository;
        public StudentService(StudentRepository studentRepository)
        {
            _studentRepository = studentRepository;
        }


        public string Hello()
        {
            return _studentRepository.Hello();
        }

    }


    // 仓储层类
     public class StudentRepository
    {
        public StudentRepository()
        {

        }

        public string Hello()
        {
            return "hello world!!!";
        }

    }


    // controller 接口调用
    StudentService _studentService;

    public ValuesController(StudentService studentService)
    {
        _studentService = studentService;
    }
如果是没有接口的单独实体类
    public class Love
    {
        // 一定要是虚方法
        public virtual string SayLoveU()
        {
            return "I ♥ U";
        }

    }

//---------------------------

//只能注入该类中的虚方法
builder.RegisterAssemblyTypes(Assembly.GetAssembly(typeof(Love)))
    .EnableClassInterceptors()
    .InterceptedBy(typeof(BlogLogAOP));
四、结语
今天的讲解就到了这里了,通过这两个小栗子,大家应该能对面向切面编程有一些朦胧的感觉了吧,感兴趣的可以深入的研究,也欢迎一起讨论,刚刚在缓存中,我说到了缓存接口,就引入了下次的讲解内容,Redis的高性能缓存框架,内存存储的数据结构服务器,可用作数据库,高速缓存和消息队列代理。下次再见咯~
1、网友好资料


