23种设计模式之七种结构型模式从概念介绍再到案例分析,不懂就从例子去感受
二、结构型模式(Structure Pattern)
1.适配器模式
将一个类的接口转换成客户希望的另外一个接口,使得不能兼容的而能在一起工作。
(1)类的适配器:当希望将一个类转换成另一个新接口的类时,可以使用类的适配器模式,创建一个新类,继承原来的类,实现新的接口。
举例:电脑网线接口(目标接口)、网线(需要适配的类)和网线适配器(适配器)。此时应该时将网线转换成电脑网线接口,我们用类的适配器实现类去继承网线类并实现抽象出来的适配器接口——相当于把网线插在了适配器上。
//要被适配的类: 网线
public class NetLine {
	public void request() {
		System.out.println("连接网线上网");
	}
}
//真正的是适配器,需要连接USB和网线
public class Adapter extends NetLine implements NetToUSB{
	@Override
	public void handleRequest() {
		super.request();	//可以上网了
	}
}
//客户端类:想上网,插不上网线
public class Compter {

	public void net(NetToUSB adapter) {
		//上网的具体实现:  找一个转接头
		adapter.handleRequest();
	}

	public static void main(String[] args) {
		//电脑、适配器、网线
		Compter compter = new Compter();
		Adapter adapter = new Adapter();
		compter.net(adapter);	//这在因为适配器是继承了网线所以相当与适配器直接把网线插上了,只要在电脑上插上适配器就行
	}
}
(2)对象适配器:当希望将一个对象转换成满足另一个新接口的对象时,可以创建网线适配器的一个类,持有网线的一个实例,在该类中调用实例的方法。
public class Adapter2 extends NetLine implements NetToUSB{

	private NetLine netLine;
	public Adapter2(NetLine netLine) {
		this.netLine = netLine;
	}
	@Override
	public void handleRequest() {
		netLine.request();	//可以上网了
	}
}
public class Compter {

	public void net(NetToUSB adapter) {
		//上网的具体实现:  找一个转接头
		adapter.handleRequest();
	}

	public static void main(String[] args) {
		//电脑、适配器、网线
		Compter compter2 = new Compter();
		NetLine netLine2 = new NetLine();
		Adapter2 adapter2 = new Adapter2(netLine2);
		compter2.net(adapter2);
	}
}
使用场景:系统使用的现有类和老系统以前的类的兼容可能会需要适配接口。
(3)接口的适配器模式:当我们不希望去实现接口中的所有方法的时候,可以去创建一个抽象类,实现所有的方法,我们在写别的类的时候,继承抽象类即可。
接口:
public interface Sourceable{
	void method1();
	void method2();
}
抽象类:
public abstract class Wrapper implements Sourceable{
	public void method1();
	public void method2();
}
public class SourceSub1 extends Wrapper{
	public void method1(){
		System.out.println("first sub1");
	}
}
public class SourceSub2 extends Wrapper{
	public void method2(){
		System.out.println("second sub2");
	}
}
public class WrapperTest{
	public satic void main(String[] args){
		Sourceable s1 = new Sourcesub1();
		Sourceable s2 = new Sourcesub2();
		s1.method1();
		s1.method2();
		s2.method1();
		s2.method2();
}
结果是:first Sub1 、second Sub2;
2.桥接模式
桥接模式偶尔类似于多继承方案,但是多继承违背了单一职责原则,桥接模式可以避免,提高了系统的扩展性。在两个维度任意一个维度的扩展都不需要修改原有系统。
举例:电脑和品牌的随意组合。
//电脑的品牌
public interface Brand {
	void info();
}
//苹果品牌
public class Apple implements Brand{
	@Override
	public void info() {
		System.out.print("苹果");
	}
}
//联想品牌
public class lenovo implements Brand{
	@Override
	public void info() {
		System.out.print("联想");
	}
}
//抽象的电脑类型
public abstract class Compter {

	//使用组合,品牌
	protected Brand brand;

	public Compter(Brand brand) {
		this.brand = brand;
	}

	public void info() {
		brand.info();  //电脑出厂自带品牌设置
	}

}
public class Laptop extends Compter{

	public Laptop(Brand brand) {
		super(brand);
	}
	public void info() {
		super.info();
		System.out.println("笔记本");
	}
}
public class Desktop extends Compter{

	public Desktop(Brand brand) {
		super(brand);
	}
	public void info() {
		super.info();
		System.out.println("台式机");
	}
}
public class Test {

	public static void main(String[] args) {
		//苹果笔记本
		Compter compter = new Laptop(new Apple());
		compter.info();
		//联想台式机
		Compter compter2 = new Desktop(new lenovo());
		compter2.info();
	}
}
最佳实践:如果一个系统需要在构建抽象化角色和具体化角色之间增加更多的灵活性,避免在两个层次之间建立静态的继承关系。
应用场景:Java语言通过Java虚拟机实现了平台的无关性,一次编译,到处运行;JDBC驱动程序也是桥接模式的应用之一,可以连接各种数据库。
3.代理模式
为什么要学习代理模式,代理模式是SpringAOP的底层。
-
静态代理
-
动态代理
3.1 静态代理
角色分析:
- 抽象角色:一般会使用接口和抽象类来解决。
- 真实角色:被代理的角色。
- 代理角色:代理真实角色,代理真实角色后,一般有附属操作。
- 客户:访问代理对象的人。
//以租房子为例
public interface Rent {

	public void rent();
}
//房东
public class Host implements Rent{
	@Override
	public void rent() {
		System.out.println("房东要出租房子!");
	}
}
//中介
public class Proxy implements Rent{

	private Host host;

	public Proxy() {
	}

	public Proxy(Host host) {
		this.host = host;
	}

	//中介出租房子,实际就是房东去出租
	public void rent() {
		host.rent();
		fee();
	}
	//中介的附属操作
	public void fee() {
		System.out.println("中介去收中介费!");
	}
}
//客户
public class Client {

	public static void main(String[] args) {
		Host host = new Host();
		//代理
		Proxy proxy = new Proxy(host);
		proxy.rent();
	}
}
代理模块的好处:
- 可以使真实的角色更加的纯粹!不用去关注一些公共的业务。
- 公共就交给代理角色,实现了业务的分工。
- 公共业务发生扩展时,方便集中管理。
缺点:一个真实角色就会产生一个代理角色,代码量会翻倍,开发效率会变低。
增强代码:对应代理模式的横切操作。
3.2 动态代理
- 动态代理和静态代理角色一样。
- 动态代理的代理类是动态生成的,不是我们直接写好的。
- 动态代理分为两大类:基于接口的动态代理类、基于类的动态代理类。
- 基于接口:JDK 动态代理【我们在这里使用的】
- 基于类:cglib
- java字节码实现:javasisit
需要了解两个类:
- Proxy :代理
- InvocationHandler :调用处理程序
上面的Rent、Host不变的情况下
//等会我们用这个类,自动生成代理类
public class ProxyInvocationHandle implements InvocationHandler{

	//被代理的接口
	private Rent rent;

	public void setRent(Rent rent) {
		this.rent = rent;
	}

	//生成得到代理类
	public Object getProxy() {
		return Proxy.newProxyInstance(this.getClass().getClassLoader(), rent.getClass().getInterfaces(), this);
	}

	//处理代理实例,并返回
	public Object invoke(Object proxy, Method method, Object[] args) throws Throwable {
		fare();
		//动态代理的本质,就是使用反射机制去实现
		Object result = method.invoke(rent, args);
		return result;
	}
	public void fare() {
		System.out.println("交中介费用");
	}
}
public class Client {

	public static void main(String[] args) {
		//真实角色
		Host host = new Host();
		//代理角色:现在没有
		ProxyInvocationHandle pth = new ProxyInvocationHandle();
		//通过调用程序处理角色来处理我们要调用的接口对象
		pth.setRent(host);
		Rent proxy = (Rent)pth.getProxy();
		proxy.rent();
	}
}
如果把生成代理做成一个模板的话,并且在租房上增加方法。
//以租房子为例
public interface Rent {

	public void rent();
	public void rentTime();
}
//房东
public class Host implements Rent{
	@Override
	public void rent() {
		System.out.println("房东要出租房子!");
	}
	@Override
	public void rentTime() {
		System.out.println("房东要求必须以一年起租!");
	}
}
//等会我们用这个类,自动生成代理类
public class ProxyInvocationHandle implements InvocationHandler{

	//被代理的接口
	private Object target;
	public void setRent(Object target) {
		this.target = target;
	}

	//生成得到代理类
	public Object getProxy() {
		return Proxy.newProxyInstance(this.getClass().getClassLoader(), target.getClass().getInterfaces(), this);
	}

	//处理代理实例,并返回
	public Object invoke(Object proxy, Method method, Object[] args) throws Throwable {
		log(method.getName());
		//动态代理的本质,就是使用反射机制去实现
		Object result = method.invoke(target, args);
		return result;
	}
	public void log(String msg) {
		System.out.println("执行了"+msg+"方法");
	}
}
public class Client {
	public static void main(String[] args) {
		//真实角色
		Host host = new Host();
		//代理角色,不存在
		ProxyInvocationHandle pth1 = new ProxyInvocationHandle();
		//设置要代理的对象
		pth1.setRent(host);
		//动态生成代理类
		Rent proxy1 = (Rent)pth1.getProxy();
		//调用实例
		proxy1.rentTime();
	}
}
动态代理的优点:
- 一个动态代理类代理的是一个接口,一般就是对应的一类业务。
- 一个动态代理类可以代理多个类,只要是实现了同一个接口即可。
4.装饰者模式
在不改变原有对象基础上,将功能附加到对象上,使对象的关联关系代替继承关系,在对象的功能扩展方面,它比继承更具有弹性,符合“闭包原则”。
举例:给汽车添加自动,飞翔的功能。
//汽车接口
public interface Car {
	void move();
}
//汽车的一个真实角色
public class CarImpl implements Car{
	@Override
	public void move() {
		System.out.println("汽车在陆地上跑");
	}
}
//装饰者的类
public class Decorator implements Car{

	private Car car;
	public Decorator(Car car) {
		this.car = car;
	}
	@Override
	public void move() {
		car.move();
	}
}
//装饰一:给汽车添加飞翔的功能
public class FlyCar extends Decorator{

	public FlyCar(Car car) {
		super(car);
	}
	public void fly() {
		System.out.println("汽车在天上飞");
	}
	public void move() {
		super.move();
		fly();
	}
}
//装饰二:给汽车添加自动的功能
public class AICar extends Decorator{

	public AICar(Car car) {
		super(car);
	}
	public void autoMove() {
		System.out.println("汽车自主跑");
	}
	public void move() {
		super.move();
		autoMove();
	}
}
public class Client {

	public static void main(String[] args) {
		Car car = new CarImpl();
		car.move();
		System.out.println("------增加一个功能------");
		Car flyCar = new FlyCar(car);
		flyCar.move();
		System.out.println("------增加两个功能------");
		Car AotuflyCar = new AICar(flyCar);
		AotuflyCar.move();
	}
}
结果展示:

5.外观模式Facade(门面模式)
他隐藏了系统的复杂性,并向客户端提供了一个可以访问系统的接口。
假设我们要去给一个人发送三个数据库安装包。
class Mysql{
	public void method1() {
		System.out.println("安装Mysql数据库桌面工具");
	}
}
class Oracle{
	public void method2() {
		System.out.println("安装Oracle数据库桌面工具");
	}
}
class DB2{
	public void method3() {
		System.out.println("安装DB2数据库桌面工具");
	}
}
有一个人需要我们就需要发送三次,太麻烦,我们可以把这三个数据库压缩在一个包里,就只用发送一IC了。同时,每个接受的人看起来也没有那么的凌乱。
class Facade{
	Mysql mysql = new Mysql();
	Oracle oracle = new Oracle();
	DB2 db2 = new DB2();
	//提供一个对外方法
	public void dosomething() {
		mysql.method1();
		oracle.method2();
		db2.method3();
	}
}
class Client{
	Facade f = new Facade();
	public void method() {
		f.dosomething();
	}

}
测试:
public class Test {

	public static void main(String[] args) {
		Client client = new Client();
		client.method();
	}
}
6.享元模式
以共享的方式高效的支持大量的细粒度对象。通过复用内存中已存在的对象,降低系统创建对象实例的性能消耗。java的 String 类型就是享元模式。
举例:很多地图游戏中会有很多树,实际上这树只有几个种类,然后同一种类的引用一个对象。
//创建一个树为例子
class Tree{

	//final一旦创建就不可再被修改,保证在多线程下的一个安全
	private final String name;
	private final String data;

	public Tree(String name,String data) {
		System.out.println(name+"被创建"+data);

		this.name = name;
		this.data = data;
	}
	public String getName() {
		return name;
	}
	public String getData() {
		return data;
	}
}
//树的一个地点位置
class TreeNode{
	private int x;
	private int y;
	private Tree tree;

	public TreeNode(int x,int y,Tree tree) {
		this.x=x;
		this.y=y;
		this.tree=tree;
	}
	public int getX() {
		return x;
	}
	public void setX(int x) {
		this.x = x;
	}
	public int getY() {
		return y;
	}
	public void setY(int y) {
		this.y = y;
	}
	public Tree getTree() {
		return tree;
	}
	public void setTree(Tree tree) {
		this.tree = tree;
	}
}
//来一个树工厂
class TreeFactory{
	//有各种类型的树,通过树的名称不同来创建树
	private static Map<String,Tree> map = new ConcurrentHashMap<>();

	public static Tree getTree(String name,String data) {
		if(map.containsKey(name)) {		//判断是否有这种树
			return map.get(name);
		}
		Tree tree = new Tree(name, data);
		map.put(name,tree);
		return tree;
	}
}
public class Test {

	public static void main(String[] args) {
		TreeNode tn1 = new TreeNode(3, 4, TreeFactory.getTree("杨树", "20米"));
		TreeNode tn2 = new TreeNode(4, 4, TreeFactory.getTree("杨树", "20米"));

		TreeNode tn3 = new TreeNode(3, 4, TreeFactory.getTree("柳树", "10米"));
		TreeNode tn4 = new TreeNode(4, 4, TreeFactory.getTree("柳树", "10米"));
	}
}

7.组合模式
将对象聚合成树形结构来表现“整体/部分”的层次结构,组合模式能让客户以一致的方式来处理个别对象以及对象组合,也就是我们可以忽略对象组合与个体对象之间的差别。
举例:一个学校院系结构,要在一个展示一个学校有多少个学院,一个学院有多少系(专业)。
原理结构图分析:
- Component:这是组合中对象声明接口,在适当情况下,实现所有类共有的接口默认行为,用于访问和管理Component子部件,Component可以是抽象类或接口。
- Leaf: 在组合中表示叶子节点,叶子节点没有子节点。
- Composite:非叶子节点,用于存储子部件,在Component接口中实现子部件的相关操纵,不如增删改查。
//学校、学院、系的父类
public abstract class OrganizationComponent {

	private String name; //名字
	private String des; //描述

	protected void add(OrganizationComponent organizationComponent) {
		//默认实现
		throw new UnsupportedOperationException();
	}
	protected void remove(OrganizationComponent organizationComponent) {
		//默认实现
		throw new UnsupportedOperationException();
	}
	//构造方法
	public OrganizationComponent(String name, String des) {
		super();
		this.name = name;
		this.des = des;
	}
	public String getName() {
		return name;
	}
	public void setName(String name) {
		this.name = name;
	}
	public String getDes() {
		return des;
	}
	public void setDes(String des) {
		this.des = des;
	}
	//方法print,做成抽象的,子类都需要
	protected abstract void print();
}
//University就是Composite,可以管理College
public class University extends OrganizationComponent{

	List<OrganizationComponent> organizationComponents = new ArrayList<OrganizationComponent>();
	public University(String name, String des) {
		super(name, des);
	}

	@Override
	protected void print() {
		System.out.println("----------"+getName()+"----------");
		//遍历organizationComponents 输出学校包含的学院
		for(OrganizationComponent organizationComponent:organizationComponents) {
			organizationComponent.print();
		}
	}
	//重写add()
	protected void add(OrganizationComponent organizationComponent) {
		organizationComponents.add(organizationComponent);
	}
	//重写remove()
	protected void remove(OrganizationComponent organizationComponent) {
		organizationComponents.add(organizationComponent);
	}
	public String getName() {
		return super.getName();
	}
	public String getDes() {
		return super.getDes();
	}
}
public class College extends OrganizationComponent{

	//这里放的是一个学院里有多少个系
	List<OrganizationComponent> organizationComponents = new ArrayList<OrganizationComponent>();
	public College(String name, String des) {
		super(name, des);
	}

	@Override
	protected void print() {
		System.out.println("----"+getName()+"----");
		//遍历organizationComponents 输出学校包含的学院
		for(OrganizationComponent organizationComponent:organizationComponents) {
			organizationComponent.print();
		}
	}
	//重写add()
	protected void add(OrganizationComponent organizationComponent) {
		//将来实际业务,College的add和University add不一定完全一样
		organizationComponents.add(organizationComponent);
	}
	//重写remove()
	protected void remove(OrganizationComponent organizationComponent) {
		organizationComponents.add(organizationComponent);
	}
	public String getName() {
		return super.getName();
	}
	public String getDes() {
		return super.getDes();
	}
}
//系
public class Department extends OrganizationComponent{

	public Department(String name, String des) {
		super(name, des);
	}
	@Override
	protected void print() {
		System.out.println(getName());
	}
	//add ,remove就不要用重写了,因为是叶子节点
	public String getName() {
		return super.getName();
	}
	public String getDes() {
		return super.getDes();
	}
}
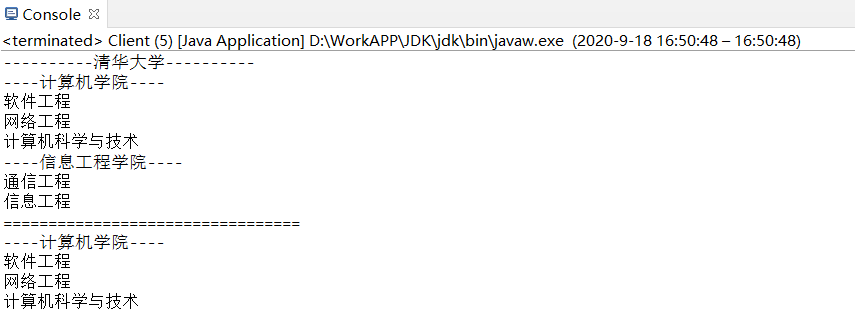
public class Client {
	public static void main(String[] args) {
		//从小到大进行创建
		OrganizationComponent university = new University("清华大学", "中国顶级大学");

		//创建学院
		OrganizationComponent computerCollege = new College("计算机学院", "计算机");
		OrganizationComponent infoEngineerCollege = new College("信息工程学院", "信息工程");

		//创建专业并加入到学院中
		computerCollege.add(new Department("软件工程", "软件"));
		computerCollege.add(new Department("网络工程", "网络"));
		computerCollege.add(new Department("计算机科学与技术", "计算机科学与技术"));
		infoEngineerCollege.add(new Department("通信工程", "通信"));
		infoEngineerCollege.add(new Department("信息工程", "信息"));

		//将学院添加到学校
		university.add(computerCollege);
		university.add(infoEngineerCollege);

		//输出整个学校结构
		university.print();
		//输出计算机学院结构
		System.out.println("=================================");
		computerCollege.print();
	}
}