给你的 ASP.NET Core 程序插上 Feature Flag 的翅膀
前言
我们知道,目前大多数应用程序在正式发布到生产环境之前都会经历多个不同的测试环境,通过让应用程序在多个不同的环境中运行来及时发现并解决问题,避免在线上发生不必要的损失。这是对于整个软件的发布流程来讲。但是如果想让我们的应用程序在线上环境中通过满足一些动态条件(比如电商平台在某一时间段的促销活动)从而能开启一些临时功能的话又该怎么办呢?如果你试图通过重新打包发布的方式来解决这个问题,可能有些过于大动干戈了。本文,笔者将介绍通过 Feature Flag 的方式来解决这个问题。
正文
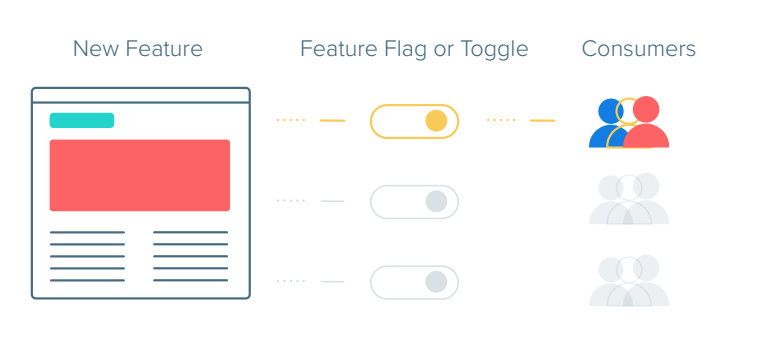
Feature Flag 中文可译为 功能开关。通过使用这种方式,可以对我们的功能进行条件化配置,当程序在线上环境运行时,如果当前环境符合我们某一特性功能开启/关闭的条件时,应用程序会自动开启/关闭该功能。整个过程不需要人工参与,全部都是由系统本身来完成相应功能的开启和关闭。
那在 .NET Core 中,我们该如何实现该功能呢?
微软为我们很贴心地提供了两个开发包:Microsoft.FeatureManagement 和 Microsoft.FeatureManagement.AspNetCore,该实现是基于 .NET Core 的配置系统 ,所以任何 .NET Core 程序都可以轻易集成该功能。
目前还处于预览版阶段,需要在 NuGet 上勾选
use prerelease
因此,我们只需将对应包安装到我们的应用程序中即可。
接下来,我们就一起看一下如何在 ASP.NET Core 中集成该功能。
使用入门
创建一个 ASP.NET Core Web Application 后,安装如下包:
Install-Package Microsoft.FeatureManagement.AspNetCore -Version 2.0.0-preview-010610001-1263
接着在 Startup 中的 ConfigureServices 进行相应配置,示例如下:
public void ConfigureServices(IServiceCollection services)
{
    services.AddFeatureManagement();
    services.AddControllersWithViews();
}
至此,我们的程序已经支持 Feature Flag 功能了,使用方式就简单了,这里展示一个相对简单的方式。
首先,在 appsettings.json 进行配置,如下所示:
  "FeatureManagement": {
    "NewFeatureFlag": true,
  }
然后,在 Index.cshtml 通过使用 feature 标签来进行相应配置,示例如下所示:
@using Microsoft.FeatureManagement
@inject IFeatureManager FeatureManager
@addTagHelper *,Microsoft.FeatureManagement.AspNetCore
@{
    ViewData["Title"] = "Home Page";
}

<div class="text-center">
    <h1 class="display-4">Welcome</h1>

    <feature name="NewFeatureFlag" requirement="All">
        <a asp-action="NewFeature">Go to the new feature.</a>
    </feature>
</div>
此时,我们运行起程序后就可以看到 feature 标签内的内容就可以渲染出来,如果我们在配置中将 NewFeatureFlag 值设置为 False 后,feature 标签内的内容就会消失,你可以通过查看网页源码的方式来查看具体细节。
接下来笔者介绍一下微软为我们内置的两个功能开关:
PercentageFilter
PercentageFilter 是支持百分比的随机开关,通过使用这种方式,可以让一个功能在每次请求中以一个百分比概率的形式来开启/关闭。
- 注入功能开关
Startup.cs
public void ConfigureServices(IServiceCollection services)
{
    services.AddFeatureManagement()
        .AddFeatureFilter<PercentageFilter>();
    services.AddControllersWithViews();
}
- 配置功能开关
appsettings.json
  "FeatureManagement": {
    "RandomFlag": {
      "EnabledFor": [
        {
          "Name": "Percentage",
          "Parameters": {
            "Value": 50
          }
        }
      ]
    }
  }
这里配置的是在每次请求时以 50% 的概率来开启该功能,其对应的配置类为:
PercentageFilterSettings
- 使用功能开关
Index.cshtml
@using Microsoft.FeatureManagement
@inject IFeatureManager FeatureManager
@addTagHelper *,Microsoft.FeatureManagement.AspNetCore
@{
    ViewData["Title"] = "Home Page";
}

<div class="text-center">
    <h1 class="display-4">Welcome</h1>

    <feature name="RandomFlag">
        <h2>I am a Random Flag!</h2>
    </feature>

    <p>Learn about <a href="https://docs.microsoft.com/aspnet/core">building Web apps with ASP.NET Core</a>.</p>
</div>
这时,当我们运行起程序后就会看到如下图所示的效果:

TimeWindowFilter
TimeWindowFilter 是时间段的随机开关,通过使用这种方式,可以让一个功能在指定的时间段内来开启/关闭。
- 注入功能开关
Startup.cs
public void ConfigureServices(IServiceCollection services)
{
    services.AddFeatureManagement()
        .AddFeatureFilter<TimeWindowFilter>();
    services.AddControllersWithViews();
}
- 配置功能开关
appsettings.json
  "FeatureManagement": {
    "RandomFlag": {
      "EnabledFor": [
        {
          "Name": "Percentage",
          "Parameters": {
            "Start": "2019/12/27 5:04:00 +00:00",
            "End": "2019/12/27 5:04:05 +00:00"
          }
        }
      ]
    }
  }
这里需要注意的是,配置里面的
Start和End是DateTimeOffset类型,并且需要配置为 UTC 的时间,所以在实际使用过程中需要考虑时区问题(你可以通过调用DateTimeOffset.UtcNow的方式来获取相应时间的格式)。其对应的配置类为:TimeWindowFilterSettings
- 使用功能开关
Index.cshtml
@using Microsoft.FeatureManagement
@inject IFeatureManager FeatureManager
@addTagHelper *,Microsoft.FeatureManagement.AspNetCore
@{
    ViewData["Title"] = "Home Page";
}

<div class="text-center">
    <h1 class="display-4">Welcome</h1>

    <feature name="TimedFlag">
        <h2>I am a Timed Flag!</h2>
    </feature>
    <p>@DateTimeOffset.UtcNow.ToString()</p>

    <p>Learn about <a href="https://docs.microsoft.com/aspnet/core">building Web apps with ASP.NET Core</a>.</p>
</div>
这时,当我们运行起程序后就会看到如下图所示的效果:

自定义功能开关
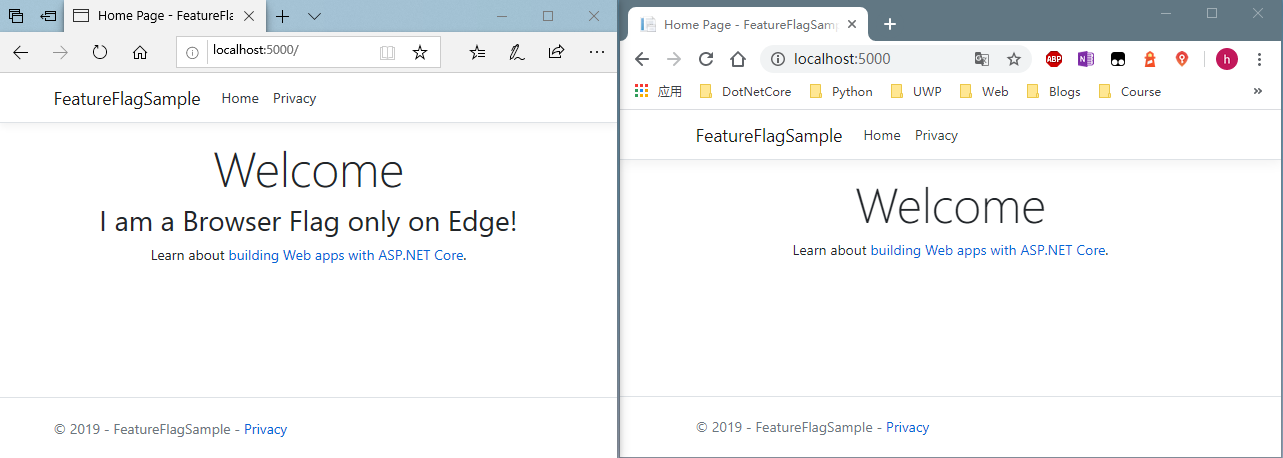
最后要介绍的是如果创建和使用自定义的功能开关,笔者这里做一个这样的示例,当网站被 Microsoft Edge 浏览器访问时,显示功能,其余浏览器则隐藏功能。
这里,笔者创建一个配置的映射类 BrowserFilterSettings 和执行过滤的操作类 BrowserFeatureFilter,示例代码如下所示:
public class BrowserFilterSettings
{
    public string[] AllowedBrowsers { get; set; }
}

[FilterAlias("BrowserFilter")]
public class BrowserFeatureFilter : IFeatureFilter
{
    private readonly IHttpContextAccessor _httpContextAccessor;
    public BrowserFeatureFilter(IHttpContextAccessor httpContextAccessor)
    {
        _httpContextAccessor = httpContextAccessor;
    }
    public Task<bool> EvaluateAsync(FeatureFilterEvaluationContext context)
    {
        var userAgent = _httpContextAccessor.HttpContext.Request.Headers["User-Agent"].ToString();
        var settings = context.Parameters.Get<BrowserFilterSettings>();
        return Task.FromResult(settings.AllowedBrowsers.Any(userAgent.Contains));
    }
}
接着,进行功能开关的注入,示例代码如下所示:
public void ConfigureServices(IServiceCollection services)
{
    services.AddHttpContextAccessor();
    services.AddFeatureManagement()
        .AddFeatureFilter<BrowserFeatureFilter>();
    services.AddControllersWithViews();
}
然后,进行功能开关的配置,示例配置如下所示:
  "FeatureManagement": {
    "BrowserFlag": {
      "EnabledFor": [
        {
          "Name": "BrowserFilter",
          "Parameters": {
            "AllowedBrowsers": [
              "Edge"
            ]
          }
        }
      ]
    }
  }
接着,使用方式如下所示:
@using Microsoft.FeatureManagement
@inject IFeatureManager FeatureManager
@addTagHelper *,Microsoft.FeatureManagement.AspNetCore
@{
    ViewData["Title"] = "Home Page";
}

<div class="text-center">
    <h1 class="display-4">Welcome</h1>

    <feature name="BrowserFlag">
        <h2>I am a Browser Flag only on Edge!</h2>
    </feature>

    <p>Learn about <a href="https://docs.microsoft.com/aspnet/core">building Web apps with ASP.NET Core</a>.</p>
</div>
这时,当我们分别用 Microsoft Edge 和 Google Chrome 访问站点时就会看到如下图所示的效果:
总结
借助于 Microsoft.FeatureManagement.AspNetCore 扩展包,我们可以很容易实现 Feature Flag 效果。又由于这种实现是基于 IConfiguration 的,所以很具有通用性。这里列出官方给出的优点:
- A common convention for feature management
- Low barrier-to-entry
- Built on IConfiguration
- Supports JSON file feature flag setup
- Feature Flag lifetime management
- Configuration values can change in real-time, feature flags can be consistent across the entire request
- Simple to Complex Scenarios Covered
- Toggle on/off features through declarative configuration file
- Dynamically evaluate state of feature based on call to server
API extensions for ASP.NET Core and MVC framework - Routing
- Filters
- Action Attributes
非常感谢你能阅读这篇文章,希望它能对你有所帮助。

